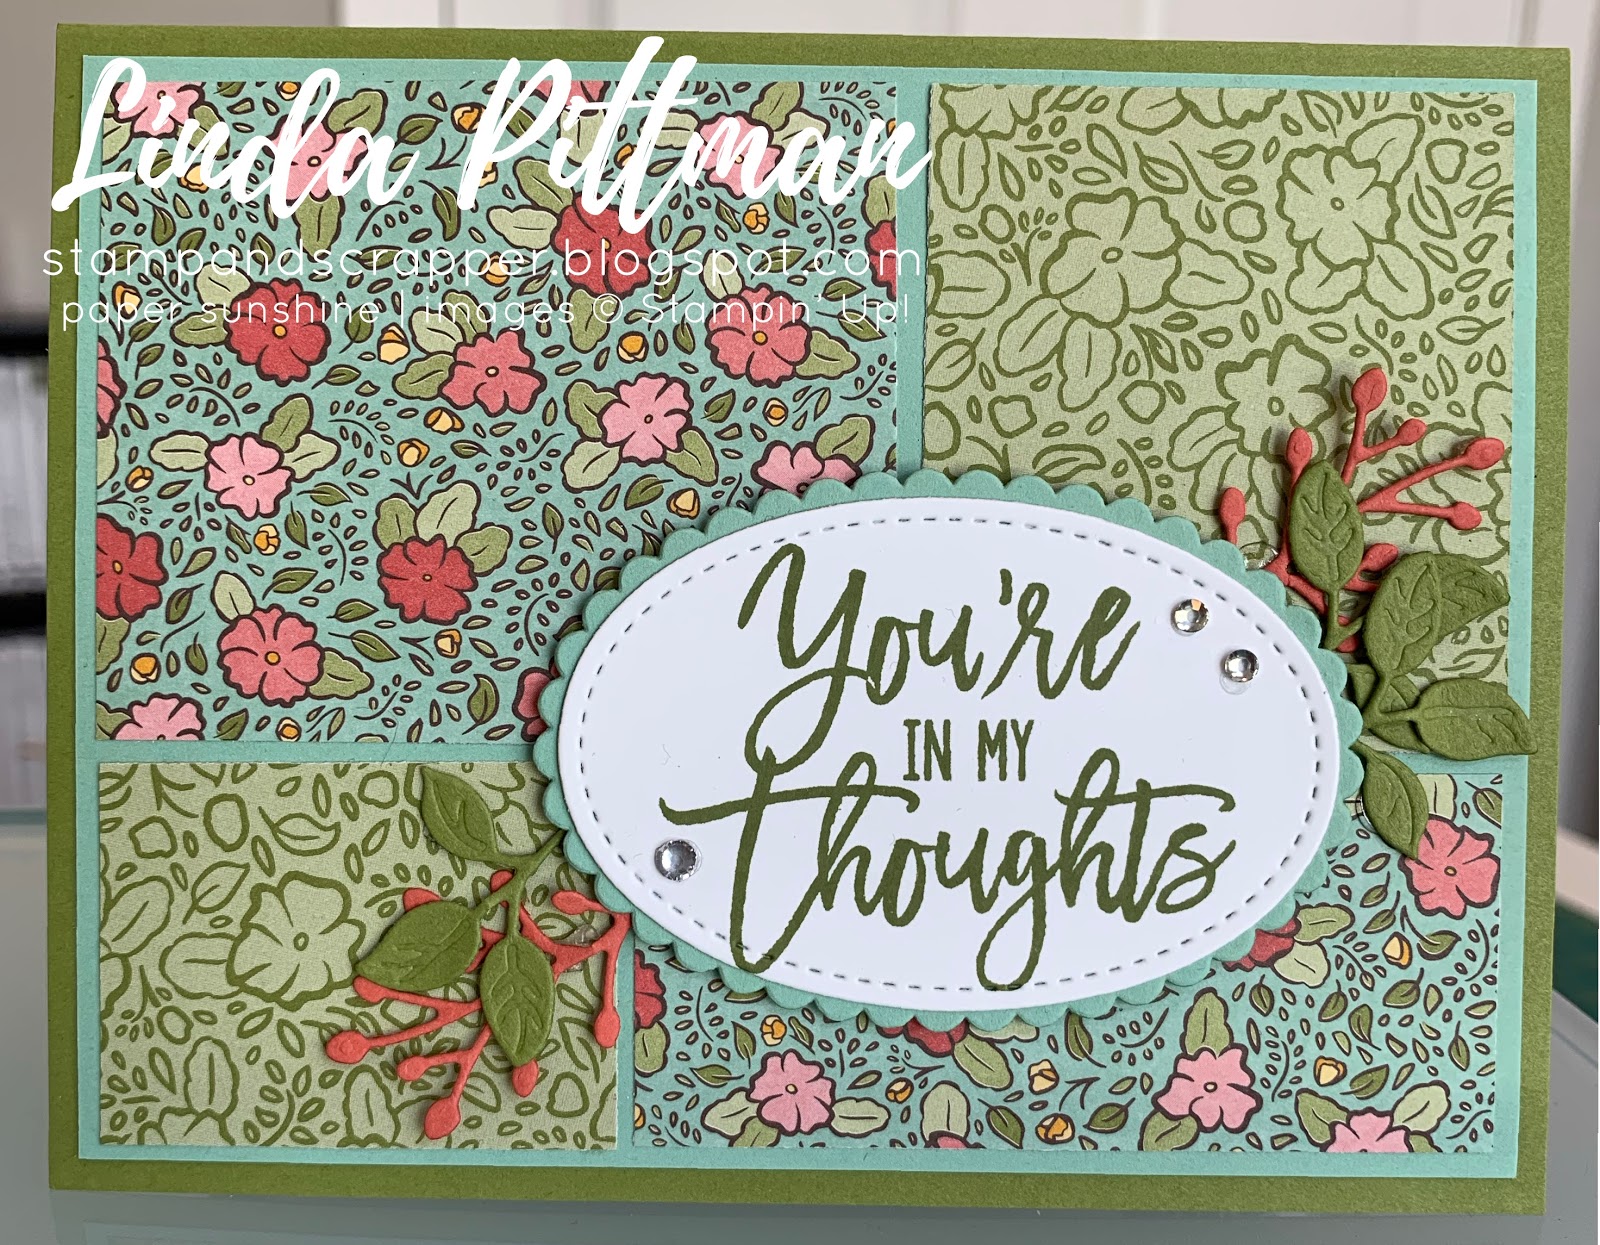
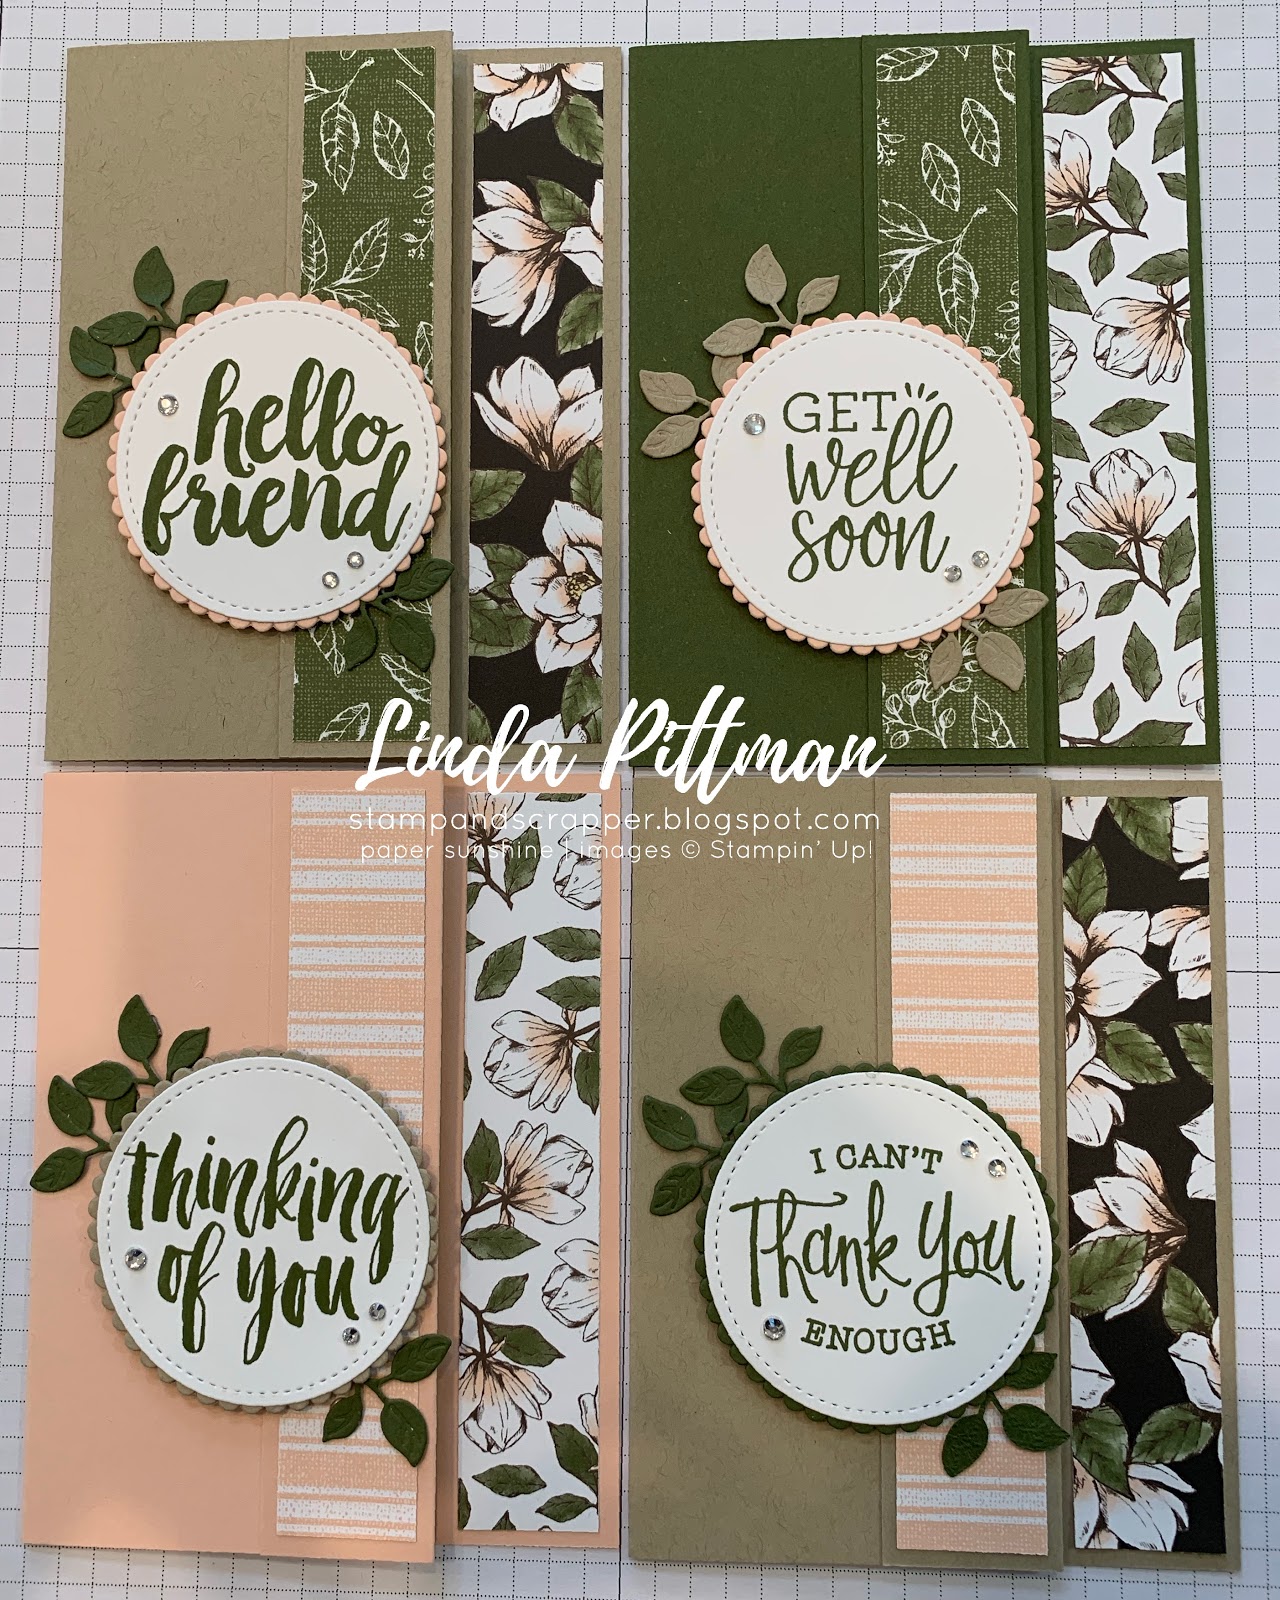
Showing posts with label Thinking of You Card. Show all posts

Saturday, March 18, 2023

BEAUTIFUL THISTLES

 Hi, Friends,

I have another card project for you today; this was our third project at Play Day earlier in March.  It uses the stamp set Beautiful Thistles.

I like the way it turned out.  It also uses one of the new Online Exclusives items, one of the Basic 3D Embossing Folders.  These are items that can only be viewed online, and will not appear in any of the print catalogs.  But you can order them on any type of order, online or by placing an order through me.

MY RECIPE:

     STAMPS:  Beautiful Thistles

     CARDSTOCK:
          FRONT:  
              Crumb Cake:  5-1/2 x 8-1/2, scored at 4-1/4
                Basic White:  4 x 5-1/4
                Highland Heather:  3-7/8 x 3-7/8
                Subtles DSP:  1-1/2 x 3-7/8
          SCRAPS:
                Basic White, Crumb Cake
          INSIDE:
                Highland Heather:  3-3/4 x 5
                Basic White:  3-5/8 x 4-7/8

     INK:  Early Espresso

     BLENDS:  Granny Apple Green, Highland Heather

     DIES:  Stylish Shapes Dies, Stitched Rectangle Dies

     ACCESSORIES:  SU Die Cut Machine, Basics 3D Embossing Folders, Old Olive Ribbon, Linen Thread, Rhinestones, Dimensionals

HOW I MADE IT:
  1. Use Early Espresso ink to stamp signature stamp on back of card base.
  2. Stamp small thistle on lower right corner of inside panel using Early Espresso ink.  Color using markers.
  3. Adhere inside panels together; adhere to inside of card base.
  4. Adhere embossed Highland Heather Cardstock to top of Basic White Cardstock; adhere patterned paper to bottom of Basic White Cardstock.  
  5. Adhere Old Olive ribbon to seam of embossed Cardstock and patterned paper.  Tie linen thread around Old Olive ribbon.
  6. Adhere panel to front of card base.
  7. Use Early Espresso ink to stamp large thistle on scrap of Basic White Cardstock.  Cut out using die and SU Die Cut Machine.  Color using markers.
  8. Attach die cut to front of card base using dimensionals.
  9. Stamp sentiment using Early Espresso ink on scrap of Crumb Cake Cardstock.  Cut out using die and SU Die Cut Machine.
  10. Adhere sentiment die cut to front of card base
  11. Add rhinestones (see sample for placement.
Here is a picture of the inside:


Thank you for stopping by today!  Hope you enjoyed our Play Day project with Beautiful Thistle!

Happy stamping,
Linda


Saturday, October 9, 2021

DAISY GARDEN THINKING OF YOU! PLAY DAY PROJECT TWO!

 Hi, Friends,

The kitties are sleeping, so this is a good time for me to try to do a blog post.  They think they can “help” with everything, including computer work.  Here is a picture of them, looking out my craft room window:


I have been trying to let them into my craft room when I am in there.  So far, it has worked OK, but Zoe is a climber (she climbed my three tiered card!) so it is probably just a matter of time before they manage to get to the top of my craft desk.  I do enjoy it when they sleep under the desk while I am working!

Today I am sharing the second project we made at October Play Day:


This card uses the Daisy Garden background stamp.  We simply stamped the image using Night of Navy ink and colored it using Blends markers!  I like the colors we used (Night of Navy and Granny Apple Green)—I like green/blue combinations!

MY RECIPE:

     STAMPS:  Daisy Garden, Blossoms in Bloom

     CARDSTOCK:
          Night of Navy:  5-1/2 x 8-1/2, scored at 4-1/4
          Granny Apple Green:  3-3/4 x 5
          Basic White:  3-5/8 x 4-7/8
               SCRAPS:  Basic White, Granny Apple Green
               INSIDE:
                    Granny Apple Green:  3-3/4 x 5
                    Basic White:  3-4/8 x 4-7/8

     INK:  Night of Navy

     BLENDS:  Daffodil Delight (D), Granny Apple Green (D)

     ACCESSORIES:  Ovals Layering Dies (Retired), SU Die Cut Machine, Linen Thread, Pearls, Dimensionals


When I am inking up a big stamp (like a background stamp) I like to lay it on the table, rubber side up, open the ink pad and apply the ink by tapping the ink pad on the stamp.  It is the easiest way I have found to get the ink evenly on the stamp.

HOW I MADE IT:

1.  Use the Night of Navy ink to stamp signature stamp on back of card base.

2.  Stamp a small portion of the Daisy Garden stamp on the lower right corner of the inside panel.  Color using markers.


3.  Adhere inside panels together.  Adhere to inside of card base.

4.  Lay large flower stamp flat on the table with rubber side up.  Ink stamp with Night of Navy ink.  Lay Basic White cardstock on top of stamp.  Cover with scrap paper.  Holding papers still with one hand, rub the scrap paper all over.  Remove scrap paper and stamped image from stamp.

5.  Color stamped image using markers.

6.  Adhere stamped and colored image to Granny Apply Green cardstock.  Tie linen thread around the panel, then tie in knot.

7.  Adhere stamped panel to front of card base.

8.  Use Night of Navy ink to stamp sentiment on scrap of Basic White cardstock.  Cut out using die and SU Die Cut Machnie.

9.  Adhere sentiment to Granny Apple Green scalloped die cut.

10.  Attach sentiment to front of card using dimensionals.

11.  Add pearls (see sample for placement).


 You will especially like this card if you love coloring!  By NOT coloring the flower petals, it does speed up the coloring process.  

This card was greatly influenced by one I found on Pinterest created by Diane Hutchinson, craftsbythebow.blogspot.com, post dated July 28, 2021.  I like to give credit where credit is due!

Thanks for stopping by today; I certainly hope you enjoyed the project I shared.  I have several Christmas projects to share with you over the coming days.

Happy stamping,
Linda


Saturday, February 6, 2021

POSITIVE THOUGHTS HUGS PRAYERS LOVE CARD!

Hi, Friends,

If you ever need a card that just says "I care" for whatever purpose, then this is a good one for you!  It uses one of my favorite stamp sets, Positive Thoughts, from the 2020 - 2021 Annual Catalog.  


 RECIPE:

     STAMPS:  Positive Thoughts

     CARDSTOCK:  

          Crumb Cake:  5-1/2 x 8-1/2, scored at 4-1/4

          Old Olive:  3-5/8 x 4-7/8

          Flower & Field DSP:  3-1/2 x 3-1/2

          Flower & Field DSP:  1-1/2 x 3-1/2

               SCRAPS:  Bumblebee, Old Olive, Whisper White

               INSIDE:

                    Old Olive:  3-3/4 x 5

                    Whisper White:  3-5/8 x 4-7/8

INK:  Memento Black, Old Olive

BLENDS MARKERS:  Mango Melody, Pumpkin Pie

ACCESSORIES:  Stitched Shapes Dies, Squares Layering Dies, Ornate Layer Dies, SU Die Cut Machine, Dimensionals, Matte Black Dots

For the inside of the card:


I stamped the butterfly with Memento Black ink, then colored it with Mango Melody and Pumpkin Pie Blends markers.

HOW I MADE IT:

1.  Use Memento Black ink to stamp signature stamp on back of card base.

2.  Stamp "butterfly" using Memento Black ink on lower right corner of inside panel.  Color the butterfly using the Mango Melody marker.  Color just the inside of each wing using a bit of Pumpkin Pie marker.  Then use the Mango Melody marker to blend the two colors together.

3.  Adhere the inside panels together; adhere to inside of card base.

4.  Adhere flowered DSP to top of Old Olive cardstock.  Adhere Bumblebee polka-dot DSP to bottom of Old Olive cardstock.  Adhere to front of card base.

5.  Use rectangle die to cut stitched rectangle from Old Olive cardstock using die from Ornate Layers Dies and SU Die Cut Machine.  Adhere to "seam" of patterned papers.

6.  Stamp sentiment onto a scrap of Whisper White cardstock using Old Olive ink.  Cut out using die from Stitched Shapes Dies and SU Die Cut Machine.

7.  Cut scalloped square from Bumblebee cardstock using Squares Layering Dies and SU Die Cut Machine.

8.  Adhere stamped sentiment to scalloped square.  Attach to front of card base using dimensionals.

9.  Add Matte Black Dots to front of card base.  See sample for placement.


The Flower & Field DSP is one of the Sale-a-bration options that you can get for free right now with a purchase of $50 merchandise from Stampin' Up!  It is absolutely stunning.  If you want it, be sure to place your order soon, because Sale-a-bration only lasts until the end of February this year!  


Hope you are having an awesome weekend, and that you enjoyed the project I shared with you today!

Happy stamping,

Linda

Sunday, August 23, 2020

PRIZED PEONY COLOR YOUR DSP!

Hi, Friends,
Today, I have another project for you using the Peony Garden Suite projects.  This one uses the simple technique of coloring your DSP.  It is amazing how much different the DSP looks when you use your markers and color all or part of the DSP!  I used this DSP and colored in the flowers and leaves with the Petal Pink Blends (light).


You can see the difference when you look at the strip of DSP at the bottom of the card:


MY RECIPE FOR THIS CARD:

STAMPS:  Prized Peony

CARDSTOCK:
     Crumb Cake:  5-1/2 x 8-1/2, scored at 4-1/4
     Petal Pink:  4 x 5-1/4
     Whisper White:  3-7/8 x 5-1/8
     Peony Garden DSP:  1-1/2 x 3-7/8
          SCRAPS:  Crumb Cake, Whisper White
               INSIDE:
                    Petal Pink:  3-3/4 x 5
                    Whisper White:  3-5/8 x 4-7/8

INK:  Petal Pink, Crumb Cake

BLENDS:  Petal Pink, Old Olive (L),

ACCESSORIES:  Hippo and Friends Dies, Peony Dies, Magnetic Platform, Big Shot, Tasteful Textile Embossing Folder, Sponge, Dimensionals, Elegant Faceted Gems, Braided Linen Trim


HOW I MADE IT:

1.  Use scoreboard to score card base at 4-1/4.  Fold card base, and burnish fold using bone folder to make a sharp crease.

2.  Use Crumb Cake ink to stamp signature stamp on back of card base.

3.  Stamp small flower image on lower right corner of inside panel.  Color using markers.  Use sponge and Crumb Cake ink to lightly sponge the inside panels.

4.  Adhere inside panels together; adhere to inside of card base.


5.  Use Tasteful Textile Embossing Folder and Big Shot to emboss Whisper White cardstock.

6.  Color the DSP images using the Petal Pink (L) blends marker.

7.  Use sponge and Crumb Cake ink to lightly sponge the front of the card base, the Petal Pink cardstock, Whisper White embossed cardstock, and the colored DSP.

8.  Adhere DSP (colored with markers) to the bottom of the embossed Whisper White cardstock.  Adhere panel to Petal Pink cardstock.  Adhere Braided Linen Trim to seam.  Adhere panel to front of card base.

9.  Stamp sentiment using Crumb Cake ink onto scrap of Whisper White cardstock.  Cut out using Hippo and Friends Dies and Big Shot.  Lightly sponge die cut using Crumb Cake ink and a sponge.

10.  Use Hippo and Friends Dies and Big Shot to cut out Crumb Cake die cut.  Lightly sponge die using Crumb Cake ink and sponge.

11.  Adhere sentiment die cut to Crumb Cake die.  Attach to front of card base using dimensionals.

12.  Stamp small flower image using Crumb Cake on scrap of Whisper White cardstock.  Color using markers.  Cut out using Peony Dies and Big Shot.  Lightly sponge using Crumb Cake ink.

13.  Attach flower image to sentiment die cut using dimensionals.

14.  Add Elegant Faceted Gems to sentiment die cut.  See sample for placement.


I hope you are having an awesome weekend!  Take some time to make someone's day by making them a special card and mailing it to them!

Happy stamping,
Linda

Monday, June 8, 2020

ORNATE GARDEN SUITE SAMPLER—TAKE TWO!

Hi, Friends,
It is a beautiful day in the neighborhood today, but very warm, somewhere around 90 degrees!  But it is sunny, so I will keep it; I LOVE a beautiful sunny day!

As promised, I will be sharing projects using the Ornate Garden Suite products, so here is another project (I actually made a second version using a second sentiment which I will also share).  This one features the Ornate Floral Embossing Folder and a die from the Ornate Layers Dies.

CARD ONE:


CARD RECIPE:

STAMPS:  Ornate Style, Ornate Thanks

CARDSTOCK:
     Crumb Cake:  5-1/2 x 8-1/2, scored at 4-1/4
     Old Olive:  4 x 5-1/4
     Whisper White:  3-7/8 x 3-7/8
     Ornate Garden DSP:  1-1/2 x 3-7/8
     SCRAPS:  Old Olive, Whisper White
          INSIDE:
               Old Olive:  3-3/4 x 5
               Whisper White:  3-5/8 x 4-7/8

INK:  Old Olive, Memento Black, Crumb Cake

BLENDS:  Old Olive, Mango Melody, Pumpkin Pie

ACCESSORIES:  Ornate Floral Embossing Folder, Ornate Layers Dies, Stitched Rectangles Dies, Magnetic Platform, Big Shot, Ornate Garden Ribbon Combo Pack, Rhinestones


Here is a closer picture of the sentiment layers.  I stamped the "THANKS" using Old Olive ink and the "for everything" with Crumb Cake ink.


HOW I MADE IT:

1.  Use scoreboard to score card base at 4-1/4.  Fold card and burnish with bone folder.

2.  Stamp signature stamp on back of card using Old Olive ink.

3.  Stamp flower using Memento Black ink on lower right corner of inside panel.  Color using markers.  Adhere inside panels together; adhere to inside of card base.

4.  Emboss Whisper White panel using the Ornate Floral Embossing Folder and Big Shot.  Adhere to top of Old Olive cardstock panel.

5.  Adhere Designer Series Paper to bottom of Old Olive cardstock panel.  Adhere Old Olive ribbon at seam.

6.  Adhere Old Olive panel to front of card base.

7.  Use Ornate Layers Dies and Big Shot to cut Old Olive die cut.

8.  Stamp sentiment on scrap of Whisper White Cardstock using Old Olive and Crumb Cake ink pads.  Cut out using Stitched Rectangle Dies and Big Shot.  

9.  Adhere sentiment panel to Ornate Layers die cut.  Adhere to card front (I did not use dimensionals).

10.  Add rhinestones to sentiment panel (see sample for placement).

Here is a picture of the inside of the card:


CARD TWO:


This card is the same as the first card, except I used a different sentiment which is from the Peaceful Moments stamp set.

Closer picture of the sentiment:


Inside of card:


Thanks for stopping by and visiting my blog today!  Hope you have a wonderful day with at least a bit of time for crafting!

Happy stamping,
Linda


Friday, June 5, 2020

ORNATE GARDEN SUITE SAMPLER SAMPLE!

Hi, Friends,
Try saying that three times fast (the post title)!  As promised, I am sharing with you today two cards that could be made with the Ornate Garden Suite Sampler.  These cards do not use the Ornate Style or the Ornate Thanks stamp sets.  I did this purposefully so that you could see that you could make a beautiful card even if you don’t own the stamp set!

Here is my first card:


My recipe for this card:

STAMPS:  Thoughtful Branches (Retired)

CARDSTOCK:  
     Old Olive:  5-1/2 x 8-1/2 scored at 4-1/4
     Mint Macaron:  4-1/4 x 5
     Ornate Garden DSP:  3-7/8 x 3-7/8
     Ornate Garden DSP:  1-1/2 x 3-7/8
     SCRAPS:  Mint Macaron, Whisper White, Terracotta Tile
     INSIDE:  
          Mint Macaron:  3-3/4 x 5
          Whisper White:  3-5/8 x 4-7/8

INK:  Old Olive

ACCESSORIES:  Stitched Shapes Dies, Ovals Layering Dies, Birthday Dies (Retired), Magnetic Platform, Big Shot, Old Olive/Pretty Peacock Reversible Ribbon, Dimensionals, Rhinestones, Glue Dots

Here is a closer picture of the sentiment.  If you don't have the same dies, use what you have!  The same goes for the die cut pieces behind the sentiment--if you don't have the Birthday Dies, use something that you already have.  


HOW TO MAKE IT:

1.  Use scoring tool to score the card base at 4-1/4.  Fold the card and burnish the fold with a bone folder.

2.  Use Old Olive ink to stamp a signature stamp on the back of your card base.

3.  Stamp the leaf from the Thoughtful Branches set on the lower right corner of the inside panel using Old Olive ink.

4.  Adhere the inside panels together; adhere to inside of card base.

5.  Adhere the square DSP panel to the top of the Mint Macaron cardstock.  Adhere the smaller rectangle DSP panel to the bottom of the Mint Macaron cardstock.  Adhere ribbon to the seam of the DSP.  

6.  Adhere the above panel to the front of the card base.

7.  Use Old Olive ink to stamp the sentiment on a scrap of Whisper White cardstock.  Cut out using the Stitched Shapes Dies, Magnetic Platform, and Big Shot.

8.  Cut out scalloped oval from scrap of Mint Macaron cardstock using Layering Ovals Dies, Magnetic Platform, and Big Shot.  Adhere the stamped sentiment oval to the scalloped oval.  

9.  Cut out leaves and sprigs from Old Olive and Terracotta Tile cardstock scraps, using Birthday Dies, Magnetic Platform and Big Shot. 

10.  Lay sentiment oval on card front in approximately the place you will adhere it.  Add glue dots to leaves and attach them to the card front, taking care to place them where you like the way they look and show when the sentiment oval is attached to the card front.

11.  Attach sentiment oval to card front using dimensionals.

12.  Add rhinestones.  See sample for placement.


CARD TWO:

Card Two uses most of the same products as Card One, but is laid out with a different orientation (landscape vs. portrait) and has different cuts of the DSP:


My recipe for this card:

STAMPS:  Thoughtful Branches (Retired)

CARDSTOCK:
     Old Olive:  5-1/2 x 8-1/2, scored at 4-1/4
     Mint Macaron:  4-1/4 x 5
     Ornate Garden DSP:  2-3/8 x 2-7/8
     Ornate Garden DSP:  2-1/8 x 2-3/8
     Ornate Garden DSP:  1-3/8 x 1-7/8
     Ornate Garden DSP:  1-3/8 x 3-1/8
     SCRAPS:  Mint Macaron, Whisper White, Old Olive, Terracotta Tile
          INSIDE:
               Mint Macaron:  3-3/4 x 5
               Whisper White:  3-5/8 x 4-7/8
  
INK:  Old Olive

ACCESSORIES:  Stitched Shapes Dies, Ovals Layering Dies, Birthday Dies (Retired), Magnetic Platform, Big Shot, Dimensionals, Rhinestones, Glue Dots

This is a larger picture of the sentiment panel:


And this is a picture of the inside of the card:


HOW I MADE IT:

1.  Use scoring tool to score card base at 4-1/4.  Fold card and burnish with a bone folder.

2.  Use Old Olive ink to stamp signature stamp on back of card base.

3.  Stamp leaf from Thoughtful Branches stamp set on lower right corner of inside card panel.

4.  Adhere inside panels together; adhere to inside of card base.

5.  Adhere DSP panels to Mint Macaron cardstock.  See sample for placement.

6.  Adhere above panel to front of card base.

7.  Use Old Olive ink to stamp sentiment on scrap of Whisper White cardstock.  Cut out using Stitched Shapes Dies, Magnetic Platform, and Big Shot.

8.  Cut scalloped oval from scrap of Mint Macaron cardstock using Layering Oval Dies, Magnetic Platform, and Big Shot.  

9.  Adhere stamped sentiment oval to the scalloped oval.  

10.  Cut leaves and sprigs from Old Olive and Terracotta Tile cardstock scraps, using the dies from Birthday Dies, Magnetic Platform, and Big Shot.

11.  Lay stamped sentiment oval in the approximate position you will adhere it to later.  Add glue dots to leaves and sprigs, and adhere them to the card front, paying attention to the position of the stamped sentiment oval.  

12.  Use dimensionals to adhere the stamped sentiment oval to the front of the card base.

13.  Add rhinestones; see sample for placement.

If you want to see what the Ornate Garden Suite Sampler looks like, here is a quick picture!  I added a tag and listed the coordinating colors of the Ornate Garden DSP for your convenience!  The little flower on the tag is from the Ornate Style Stamp Set, colored with Mint Macaron and Old Olive Blends.


If you need more information about the Suite Samplers, please see my post from yesterday (June 4, 2020).  

Hope this gives you a couple of ideas about how you can use the contents of a Suite Sampler to make some awesome cards!  I will be back soon with some more possibilities!

Have an amazing weekend--hope it includes a bit of crafting!

Happy stamping,
Linda


Monday, May 18, 2020

Double Wonder—Bonus Card!

Hi, Friends,

It has been a good day today.  I did a bit of organizing in my craft room.  This time of year, with the new catalog coming out, means that I have to figure out what to keep and what to get rid of, and where to put new items that I get.  Today I labeled and put away my new in-color cardstock.  It is SO pretty!  Anyway, I wanted to share with you the very last card from our Double Wonder card set:


and the inside of the card:


The four DSP pieces on the front of the card are the "extra pieces" at the bottom of the left side of the cutting guide.  I turned them over so that all four pieces are different designs.  

Here is the recipe for this card:

STAMPS:  Rooted in Nature, Magnolia Blooms

CARDSTOCK:  
     Petal Pink:  5-1/2 x 8-1/2, scored at 4-1/4
     Petal Pink:  4-1/8 x 5-3/8
     Mossy Meadow:  3-1/4 x 3-3/4
     Magnolia Lane DSP:  1-1/2 x 1-3/4 (4) (pieces cut from DSP according to cutting guide)
     SCRAPS:  Whisper White, Petal Pink, Mossy Meadow
          INSIDE:
               Mossy Meadow:  3-3/4 X 5
               Whisper White:  3-5/8 x 4-7/8

INK:  Soft Suede, Mossy Meadow

BLENDS:  Mossy Meadow, Petal Pink

ACCESSORIES:  Stitched Shapes Dies, Layering Circles Dies, Birthday Dies (retired), Magnetic Platform, Big Shot, Subtles Embossing Folder, Rhinestones, Dimensionals, Glue Dots

This was a really, really fun project and I hope to make other card sets using other DSP in the future!

Thanks for stopping by today!  I hope you have enjoyed this project!

Happy stamping,
Linda


Sunday, May 17, 2020

Double Wonder Group Three!

Hi, Friends,
I certainly had fun yesterday—I signed up for an online card class put on by two Stampin’ Up! Demos.  They had several different classes but my favorite was the Mystery Stamping.  They gave us a few directions, then said to make a card and post it.  It was fun to see how different people used the same directions to make such different cards!  I have posted a Mystery Stamping Challenge on my Facebook Business Page—Linda’s Paper Sunshine—so come join us.  The first time can be a bit intimidating, but just relax and enjoy.  It was hard for me the first time I tried it, too, but it is good to stretch yourself a bit.  If we have three or more people participate I will randomly draw a name to receive a special prize (I love to give prizes)!

Today, I want to share with you the last group of four cards from the Double Wonder card set.  Here is a picture of the group:


These cards are actually a fun fold; it is a regular 5-1/2 x 8-1/2 card scored at 4-1/4, then scored at 1-1/4 and folded back to the front.  You can either leave the little flap loose, or you can adhere it down; I chose to adhere it to the card front.  This group of cards uses the 1" x 5-1/4" strips from the middle section of the cutting guide.  The shorter strip at the bottom is used on Group Two of the cards.  

Decide how you want to use the strips on the cards; after you have divided them out, one strip is adhered to the inside of the card base, a second strip is adhered to the 1-1/4" panel that has been folded back onto the card front.  I have taken a couple of pictures of the card standing up so you can see what it looks like:


and a second picture of the card standing up:


I have pictures of each of the cards and will give you dimensions for each card.

CARD ONE:


and the inside picture of Card One:


RECIPE FOR CARD ONE:

STAMPS:  Healing Hugs, Magnolia Blooms

CARDSTOCK:
     Mossy Meadow:  5-1/2 x 8-1/2, scored at 1-1/4 and 4-1/4
     Magnolia Lane DSP:  1 x 5-1/4 (already cut according cutting guide)
     SCRAPS:  Crumb Cake, Petal Pink, Whisper White
     INSIDE:  
          Petal Pink:  2-3/4 x 5-1/4 (cut two)
          Whisper White:  2-5/8 x 5-1/8 (cut two)


INK:  Mossy Meadow, Soft Suede

BLENDS:  Petal Pink, Mossy Meadow

ACCESSORIES:  Stitched Shapes Dies, Layering Circles Dies, Birthday Dies (Retired), Magnetic Platform, Big Shot, Rhinestones, Dimensionals, Glue Dots

CARD TWO:


inside of Card Two:


RECIPE FOR CARD TWO:

STAMPS:  Rooted in Nature, Magnolia Blooms

CARDSTOCK:  
     Petal Pink:  5-1/2 x 8-1/2, scored at 1-1/4 and 4-1/4
     Magnolia Lane DSP:  1 x 5-1/4 (pieces already cut according to cutting guide)
     SCRAPS:  Mossy Meadow, Crumb Cake, Whisper White
     INSIDE: 
          Mossy Meadow:  2-3/4 x 5-1/4 (cut two)
          Whisper White:  2-5/8 x 5-1/8 (cut two)


INK:  Mossy Meadow, Soft Suede

BLENDS:  Petal Pink, Mossy Meadow

ACCESSORIES:  Stitched Shapes Dies, Layering Circles Dies, Birthday Dies (retired), Magnetic Platform, Big Shot, Dimensionals, Rhinestones, Glue Dots

CARD THREE:


inside of Card Three:


RECIPE FOR CARD THREE:

STAMPS:  So Sentimental, Magnolia Blooms

CARDSTOCK:
     Crumb Cake:  5-1/2 x 8-1/2, scored at 1-1/4 and 4-1/4
     Magnolia Lane DSP:  1 x 5-1/4 (from DSP cut according to cutting guide)
     SCRAPS:  Mossy Meadow, Whisper White
          INSIDE:
               Mossy Meadow:  2-3/4 x 5-1/4 (cut two)
               Whisper White:  2-5/8 x 5-1/8 (cut two)

INK:  Mossy Meadow, Soft Suede

BLENDS:  Petal Pink, Mossy Meadow

ACCESSORIES:  Stitched Shapes Dies, Layering Circles Dies, Birthday Dies (retired), Magnetic Platform, Big Shot, Rhinestones, Dimensionals, Glue Dots

CARD FOUR:

inside of Card Four:


RECIPE FOR CARD FOUR:

STAMPS:  Seriously the Best, Magnolia Blooms

CARDSTOCK: 
     Crumb Cake:  5-1/2 x 8-1/2, scored at 1-1/4 and 4-1/4
     Magnolia Lane DSP:  1 x 5-1/4 (from DSP already cut according to cutting guide)
     SCRAPS:  Petal Pink, Mossy Meadow, Whisper White
     INSIDE:
          Mossy Meadow:  2-3/4 x 5-1/4 (cut two)
          Whisper White:  2-5/8 x 5-1/8 (cut two)

INK:  Mossy Meadow, Soft Suede

BLENDS:  Petal Pink, Mossy Meadow

ACCESSORIES:  Stitched Shapes Dies, Layering Circle Dies, Birthday Dies (retired), Magnetic Platform, Big Shot, Rhinestones, Dimensionals, Glue Dots

So we have the dimensions and pictures for twelve of the cards now; tomorrow I will finish this up by showing you the Bonus Card!  

Thanks so much for stopping by!  I REALLY miss you guys; hope you are safe and well, and have an awesome week this week!

Happy stamping,
Linda