Showing posts with label Get Well Card. Show all posts

Wednesday, September 1, 2021

HAND-PENNED PETALS PROJECT!

Hi, Friends, Stopping by today to share with you a project we made at Play Day this month using the Hand-Penned Petals stamp set and the AMAZING Hand-Penned Designer Series Paper!  

Here is a picture of our first project:
We used the stamps from the stamp set and ink pads to color the flowers and leaves.  It makes for a rather abstract look.

Here is my recipe for the card:

     STAMPS:  Hand-Penned Petals

     CARDSTOCK:
          Crumb Cake:  5-1/2 x 8-1/2, scored at 4-1/4
          Garden Green:  4 x 5-1/4
          Hand-Penned DSP:  3-7/8 x 3-7/8
          Hand-Penned DSP:  1-1/2 x 3-7/8
          Garden Green:  3/4 x 4
          Basic White:  2-5/8 x 3-3/4 (plus a small bit on each)
               SCRAPS:  Basic White, Garden Green
               INSIDE:
                    Garden Green:  3-3/4 x 5
                    Basic White:  3-5/8 x 4-7/8

     INK:  Memento Black, Blushing Bride, Pale Papaya, Garden Green

     ACCESSORIES:  Penned Flowers Dies, Stitched So Sweetly Dies, SU Die Cut Machine, Linen Thread, Genial Gems, Dimensionals

HOW I MADE IT:

1.  Use Memento Black ink to stamp signature stamp on back of card base.

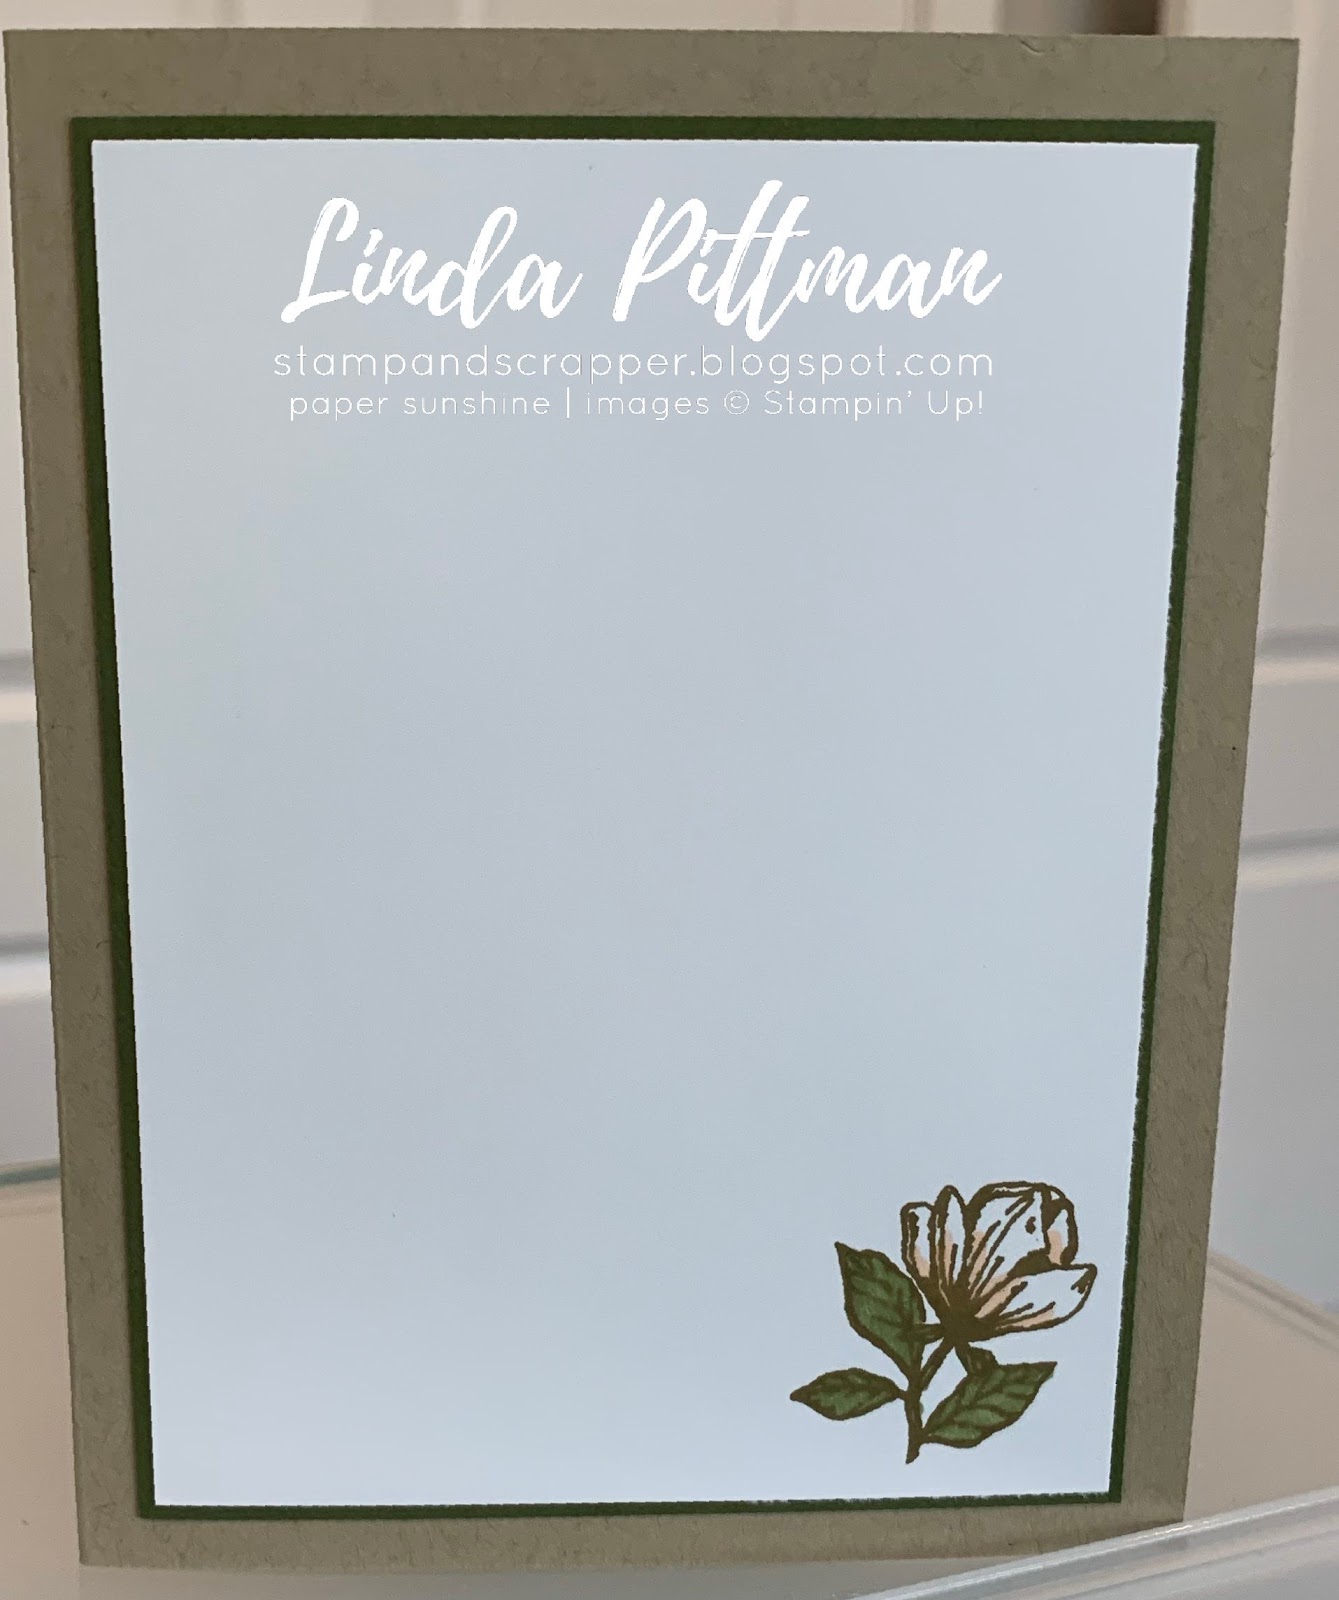
2.  Stamp small portion of large flower stamp on lower right corner of inside panel, using Memento Black ink.  Color using stamps and ink pads.

3.  Adhere inside panels together; adhere to inside of card base.

4.  Adhere patterned paper to Garden Green cardstock.  Adhere scalloped Garden Green strip at seam of paper.  Tie linen thread around Garden Green strip.

5.  Adhere panel to front of card base.

6.  Use Memento Black ink to stamp sentiment on lower right corner of Basic White cardstock.

7.  Adhere sentiment panel to Garden Green scalloped die cut.

8.  Attach panel to front of card base using dimensionals.

9.  Stamp large flower stamp on scrap of Basic White using Memento Black ink.  Color using stamps and ink pads.

10.  Cut out flower image using die and SU Die Cut Machine.  Attach to card front using dimensionals.

11.  Add Genial Gems to card front (see sample for placement).

I hope you liked today's project!  The Hand-Penned Designer Series Paper is gorgeous and it is hard to make a card that isn't beautiful when you use it!

Happy stamping,
Linda

Wednesday, August 12, 2020

HEALING HUGS PRIZED PEONY GET WELL CARD!

Hi, Friends,

I sure do miss you guys!  Being an introvert, I honestly LOVE to be home all by myself--until COVID!  Now, I REALLY miss getting together with my friends.  Well, hopefully, we will be able to get together soon and make some awesome cards together.

Last night, Doyle and I were tired of eating at the house, so we got takeout sandwiches and drove out to Chester Frost State Park, found a picnic table and had a relaxing meal, watching people kayaking and riding their jet skies.  The weather was perfect, and even though it was warm, the breeze off the river felt awesome!


Today, I have a "different" card for you.  At first glance, it looks like a pretty simple card with some DSP and a sentiment.  However, the DSP is special because I colored some of the gray and white cardstock with blends markers--Old Olive, Daffodil Delight, Petal Pink, and Gray Granite.  It wasn't hard, just took a bit of time.  If coloring is relaxing to you, then look at your Designer Series Paper and see what sheets you can use markers to color and use on a project!  It is fun to come up with something unique!


Here is the card I am sharing with you today:


MY RECIPE:

STAMPS:  Prized Peony, Healing Hugs

CARDSTOCK:
     Basic Gray:  5-1/2 x 8-1/2, scored at 4-1/4
     Gray Granite:  4 x 5-1/4
     Peony Garden DSP:  3-7/8 x 3-7/8
     Old Olive:  1-1/2 x 3-7/8
          SCRAPS:  Mossy Meadow, Basic Gray, Whisper White
               INSIDE:
                    Gray Granite:  3-3/4 x 5
                    Whisper White:  3-5/8 x 4-7/8

INK:  Old Olive, Basic Gray

BLENDS:  Gray Granite (L), Old Olive (L), Daffodil Delight (D), Petal Pink (L)

ACCESSORIES:  Stitched Shapes Dies, Squares Layering Dies, Christmas Cardinal Dies, Magnetic Platform, Big Shot, Subtles Embossing Folder, Elegant Faceted Gems, Dimensionals, Glue Dots, Gray Granite Shimmer Ribbon


HOW I MADE IT:

1.  Use scoreboard to score card base at 4-1/4.  Fold card base and burnish with bone folder to make a sharp crease.

2.  Use Basic Gray ink to stamp signature stamp on back of card base..

3.  Stamp flower using Gray Granite ink on lower right corner of inside panel.  Color using markers.

4.  Adhere inside panels together; adhere to inside of card base.

5.  Color DSP using Blends Markers.  Adhere DSP panel to top of Gray Granite cardstock.

6.  Emboss Old Olive panel using the Subtles Embossing Folder and Big Shot.  Adhere embossed panel to bottom of Gray Granite cardstock.

7.  Adhere Gray Granite Shimmer Ribbon to "seam".  Adhere panel to front of card base.

8.  Use Old Olive ink to stamp sentiment on scrap of Whisper White cardstock.  Cut out using die and Big Shot.  Adhere sentiment panel to Basic Gray scalloped square.

9.  Lay sentiment panel on front of card base approximately where you will attach it to the card.  Adhere leaves to card base, using glue dots.

10.  Attach sentiment panel to front of card base using dimensionals.

11.  Add Elegant Faceted Gems; see sample for placement.


I hope you guys are all doing well, and that you will use this card as an inspiration to make something  to give to someone special!


Happy stamping,
Linda

Tuesday, June 16, 2020

ORNATE GARDEN/SO SENTIMENTAL GET WELL CARD!

Hi, Friends,
It is a beautiful day in the neighborhood today, also a busy one.  They have delivered the cabinets to two houses, sheet rock to a third house, and are prepping the house across the street to finish painting.  I love all the activity (maybe except when there is annoying noise for a long period of time).

Anyway, today I have another project to share with you.  I couldn’t get to sleep the other night and got up and started messing with this card, but, as simple as it is, I didn’t get it finished until yesterday.  I just kept playing with it and moving things around until I liked it!  Here is my project:


I LOVE the various combinations of the Designer Series Paper in the Ornate Garden Suite, and really like the DSP combo in this card.  

MY RECIPE FOR THIS CARD:

STAMPS:  So Sentimental, Accented Blooms (Retired)

CARDSTOCK:
     Crumb Cake:  5-1/2 x 8-1/2, scored at 4-1/4
     Old Olive:  3-5/8 X 4-7/8
     Ornate Garden DSP:  3-1/2 X 3-1/2
     Ornate Garden DSP:  1-3/4 x 3-1/2
     SCRAPS:  Terracotta Tile, Old Olive, Whisper White
     INSIDE:
          Old Olive:  3-3/4 x 5
          Whisper White:  3-5/8 x 4-7/8

INK:  Terracotta Tile, Memento Black

BLENDS:  Petal Pink, Cajun Craze, Old Olive

ACCESSORIES:  Ornate Layers Dies, Stitched Shapes Dies, Circles Layering Dies, Birthday Dies (Retired), Magnetic Platform, Big Shot, Gilded Gems, Dimensionals, Glue Dots

A closer look at the sentiment panel:


HOW I MADE THE CARD:

1.  Using scoreboard, score Crumb Cake card base at 4-1/4.  Fold card base and burnish using bone folder.

2.  Stamp the signature stamp on the back of the card base using Memento Black ink.

3.  Use Memento Black ink to stamp the small flower stamp on the lower right corner of the inside panel.  Color using markers.

4.  Adhere inside cardstock panels together.  Adhere to inside of card base.

5.  Adhere DSP panels to Old Olive cardstock. 

6.  Cut rectangle from scrap of Terracotta Tile cardstock using die from Ornate Layers Dies and Big Shot.   Adhere to seam of Designer Series Paper.

7.  Adhere panel to front of card base.

8.  Stamp sentiment using Terracotta Tile ink onto scrap of Whisper White cardstock.  Cut out using Stitched Shapes Dies and Big Shot.

9.  Use Layering Circles Dies to cut scalloped circle from scrap of Old Olive cardstock.

10.  Adhere stamped circle onto Old Olive scalloped circle.  Attach to front of card base using dimensionals.

11.  Cut small leaves from scraps of Old Olive cardstock scrap using Birthday Dies and Big Shot.  Adhere behind sentiment circle using Glue Dots.

12.  Add Gilded Gems to either side of the Terracotta Tile rectangle die cut.  See sample for placement.

Here is what the inside of the card looks like:


and a close up of the flower on the inside:


I hope you enjoyed my project today as much as I enjoyed making it!  Craft a masterpiece and surprise someone with it today!

Happy stamping,
Linda


Sunday, May 17, 2020

Double Wonder Group Three!

Hi, Friends,
I certainly had fun yesterday—I signed up for an online card class put on by two Stampin’ Up! Demos.  They had several different classes but my favorite was the Mystery Stamping.  They gave us a few directions, then said to make a card and post it.  It was fun to see how different people used the same directions to make such different cards!  I have posted a Mystery Stamping Challenge on my Facebook Business Page—Linda’s Paper Sunshine—so come join us.  The first time can be a bit intimidating, but just relax and enjoy.  It was hard for me the first time I tried it, too, but it is good to stretch yourself a bit.  If we have three or more people participate I will randomly draw a name to receive a special prize (I love to give prizes)!

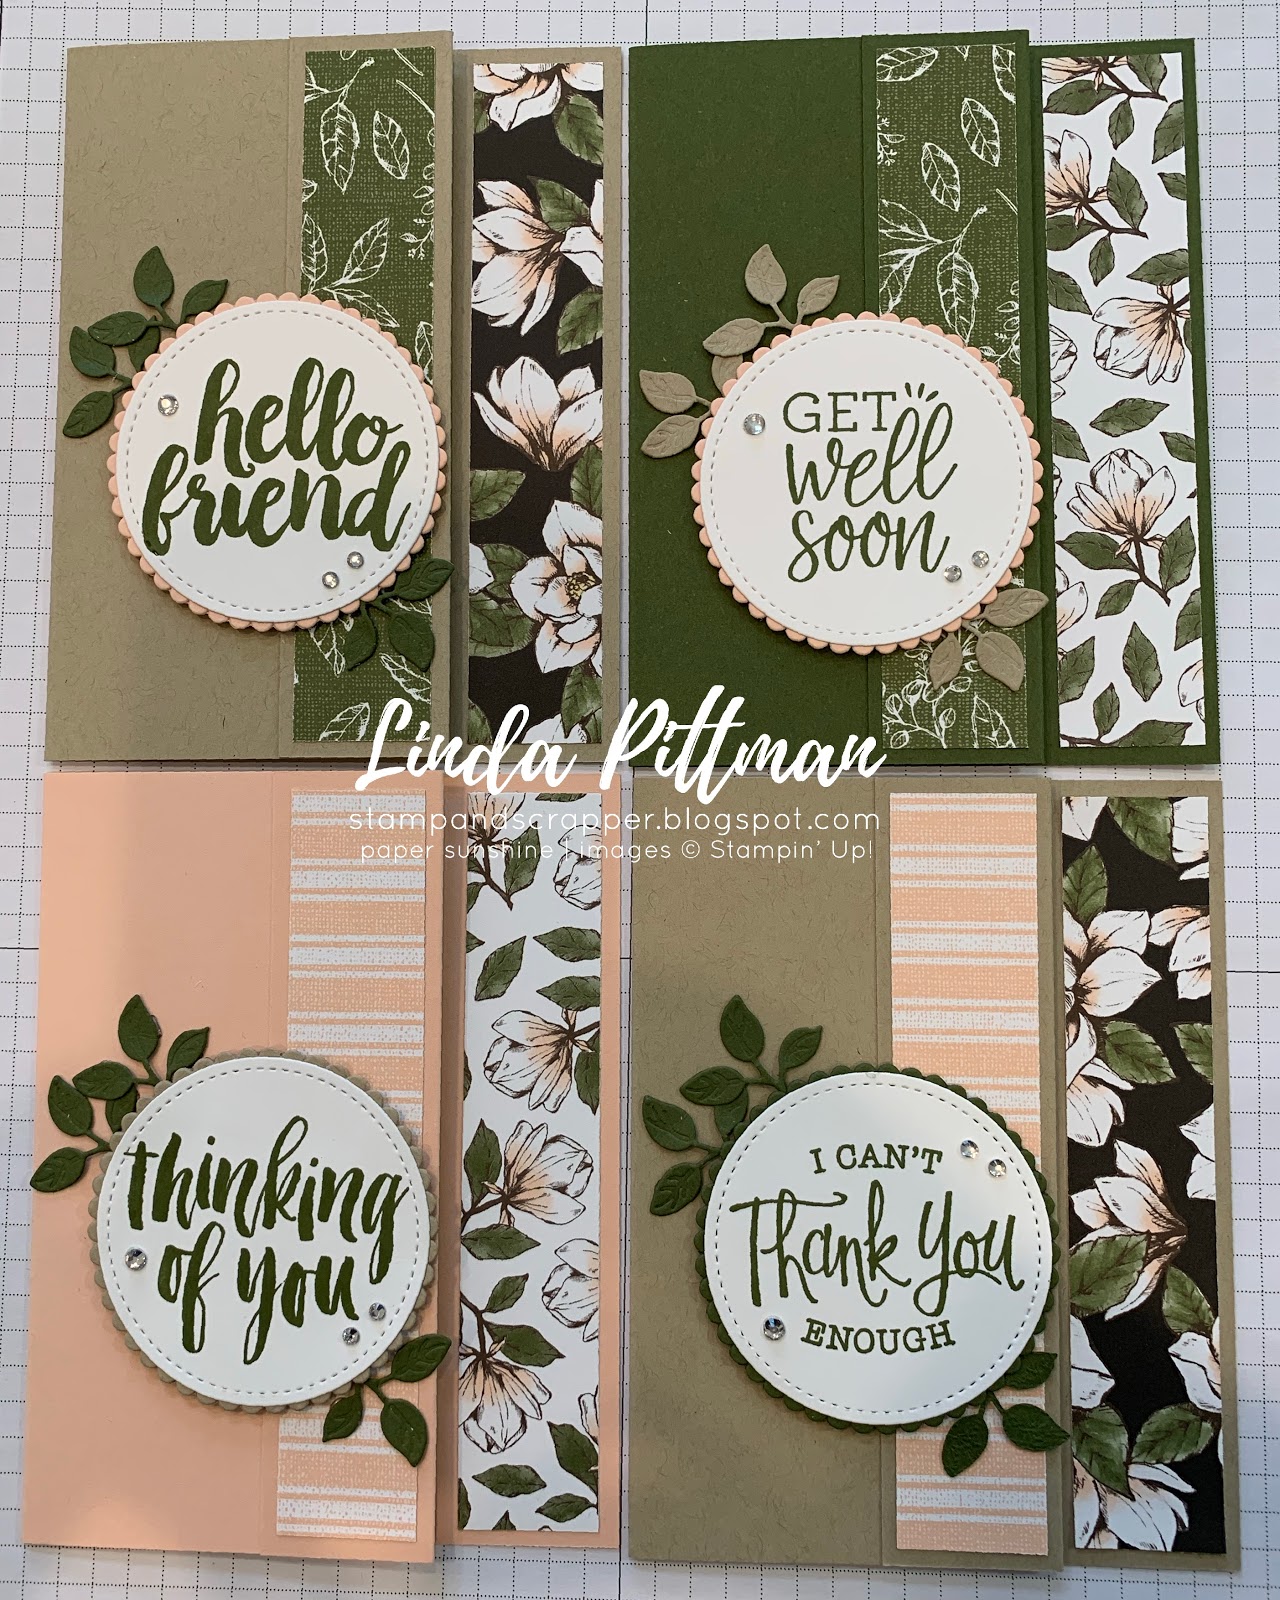
Today, I want to share with you the last group of four cards from the Double Wonder card set.  Here is a picture of the group:


These cards are actually a fun fold; it is a regular 5-1/2 x 8-1/2 card scored at 4-1/4, then scored at 1-1/4 and folded back to the front.  You can either leave the little flap loose, or you can adhere it down; I chose to adhere it to the card front.  This group of cards uses the 1" x 5-1/4" strips from the middle section of the cutting guide.  The shorter strip at the bottom is used on Group Two of the cards.  

Decide how you want to use the strips on the cards; after you have divided them out, one strip is adhered to the inside of the card base, a second strip is adhered to the 1-1/4" panel that has been folded back onto the card front.  I have taken a couple of pictures of the card standing up so you can see what it looks like:


and a second picture of the card standing up:


I have pictures of each of the cards and will give you dimensions for each card.

CARD ONE:


and the inside picture of Card One:


RECIPE FOR CARD ONE:

STAMPS:  Healing Hugs, Magnolia Blooms

CARDSTOCK:
     Mossy Meadow:  5-1/2 x 8-1/2, scored at 1-1/4 and 4-1/4
     Magnolia Lane DSP:  1 x 5-1/4 (already cut according cutting guide)
     SCRAPS:  Crumb Cake, Petal Pink, Whisper White
     INSIDE:  
          Petal Pink:  2-3/4 x 5-1/4 (cut two)
          Whisper White:  2-5/8 x 5-1/8 (cut two)


INK:  Mossy Meadow, Soft Suede

BLENDS:  Petal Pink, Mossy Meadow

ACCESSORIES:  Stitched Shapes Dies, Layering Circles Dies, Birthday Dies (Retired), Magnetic Platform, Big Shot, Rhinestones, Dimensionals, Glue Dots

CARD TWO:


inside of Card Two:


RECIPE FOR CARD TWO:

STAMPS:  Rooted in Nature, Magnolia Blooms

CARDSTOCK:  
     Petal Pink:  5-1/2 x 8-1/2, scored at 1-1/4 and 4-1/4
     Magnolia Lane DSP:  1 x 5-1/4 (pieces already cut according to cutting guide)
     SCRAPS:  Mossy Meadow, Crumb Cake, Whisper White
     INSIDE: 
          Mossy Meadow:  2-3/4 x 5-1/4 (cut two)
          Whisper White:  2-5/8 x 5-1/8 (cut two)


INK:  Mossy Meadow, Soft Suede

BLENDS:  Petal Pink, Mossy Meadow

ACCESSORIES:  Stitched Shapes Dies, Layering Circles Dies, Birthday Dies (retired), Magnetic Platform, Big Shot, Dimensionals, Rhinestones, Glue Dots

CARD THREE:


inside of Card Three:


RECIPE FOR CARD THREE:

STAMPS:  So Sentimental, Magnolia Blooms

CARDSTOCK:
     Crumb Cake:  5-1/2 x 8-1/2, scored at 1-1/4 and 4-1/4
     Magnolia Lane DSP:  1 x 5-1/4 (from DSP cut according to cutting guide)
     SCRAPS:  Mossy Meadow, Whisper White
          INSIDE:
               Mossy Meadow:  2-3/4 x 5-1/4 (cut two)
               Whisper White:  2-5/8 x 5-1/8 (cut two)

INK:  Mossy Meadow, Soft Suede

BLENDS:  Petal Pink, Mossy Meadow

ACCESSORIES:  Stitched Shapes Dies, Layering Circles Dies, Birthday Dies (retired), Magnetic Platform, Big Shot, Rhinestones, Dimensionals, Glue Dots

CARD FOUR:

inside of Card Four:


RECIPE FOR CARD FOUR:

STAMPS:  Seriously the Best, Magnolia Blooms

CARDSTOCK: 
     Crumb Cake:  5-1/2 x 8-1/2, scored at 1-1/4 and 4-1/4
     Magnolia Lane DSP:  1 x 5-1/4 (from DSP already cut according to cutting guide)
     SCRAPS:  Petal Pink, Mossy Meadow, Whisper White
     INSIDE:
          Mossy Meadow:  2-3/4 x 5-1/4 (cut two)
          Whisper White:  2-5/8 x 5-1/8 (cut two)

INK:  Mossy Meadow, Soft Suede

BLENDS:  Petal Pink, Mossy Meadow

ACCESSORIES:  Stitched Shapes Dies, Layering Circle Dies, Birthday Dies (retired), Magnetic Platform, Big Shot, Rhinestones, Dimensionals, Glue Dots

So we have the dimensions and pictures for twelve of the cards now; tomorrow I will finish this up by showing you the Bonus Card!  

Thanks so much for stopping by!  I REALLY miss you guys; hope you are safe and well, and have an awesome week this week!

Happy stamping,
Linda


Friday, May 15, 2020

Double Wonder—Second Group!

Hi, Crafty Friends,

Hope you guys are all doing well!  I miss all my crafting friends and can hardly wait until we can have in person events again!  But, until then, I am trying to work on ideas to share as much as possible with you online!  The Double Wonder is a fun way to make several cards.  I cut my Designer Series Paper (DSP) up according to the cutting guide (found in my May 12, 2020 post), then made a group of cards (the set of four that is the same design, like I am showing you today) each day.  But if you are a fast stamper, you could do the whole thing at one setting.  I probably tend to overthink everything!

Today, I am sharing with you the second group of cards from my Double Wonder.


This group uses the same basic items as the first group I shared.  The sentiments came from four stamp sets:  SO SENTIMENTAL, HEALING HUGS, ROOTED IN NATURE, and SERIOUSLY THE BEST (this one is retiring, so if you like it order it soon).  I also used the same basic colors of cardstock and ink:  Crumb Cake, Petal Pink, Mossy Meadow cardstock, and Mossy Meadow and Soft Suede ink.  

The DSP pieces I used on this group of cards is on the top left side of the cutting guide.  You should have four pieces that measure 2-1/4 x 3-1/2.  I turned them over so that I had one of each pattern to make these four cards, then determined my colors from there.

The instructions I was following called for this group to be TWO cards.  She used two pieces of the DSP, one at the top, one at the bottom, and had a short, thin piece of DSP separating the two (I used one of the short pieces on the card with the Petal Pink card base with the Hello Friend Sentiment).  The other thin strip was the only piece from the DSP that I did not use.  I revised the card a bit, and used only one of the 2-1/4 x 3-1/2 pieces of DSP on each card, meaning that I could make four cards instead of two!  So do it either way you like, making two cards or four cards!

My Basic Cutting Instructions for this group of cards:

CARD BASE:  5-1/2 X 8-1/2, scored at 4-1/4
BACK PANEL:  3-5/8 x 4-7/8
TOP SOLID PANEL:  3-1/2 x 3-1/2
DSP PANEL:  2-1/4 x 3-1/2 (from pieces you have already cut with cutting guide)
SCRAPS:  to cut out sentiment, scalloped circle and leaves
INSIDE COLORED CARDSTOCK:  3-3/4 x 5
INSIDE WHISPER WHITE CARDSTOCK:  3-5/8 x 4-7/8

I am also giving you the more specific instructions for each of the cards I made.

CARD ONE:

STAMPS:  Seriously the Best, Magnolia Blooms

CARDSTOCK: 
     Petal Pink:  5-1/2 x 8-1/2, scored at 4-1/4
     Mossy Meadow:  3-5/8 x 4-7/8
     Whisper White:  3-1/2 x 3-1/2
     Magnolia Lane DSP:  2-1/4 x 3-1/2 (from DSP cut according to cutting guide)
     Magnolia Lane DSP:  3/4 x 4 (from DSP cut according to cutting guide)
     SCRAPS:  Whisper White, Petal Pink, and Mossy Meadow
     INSIDE:  
          Mossy Meadow:  3-3/4 x 5
          Whisper White:  3-5/8 x 4-7/8

INK:  Mossy Meadow, Soft Suede

BLENDS:  Petal Pink, Mossy Meadow

ACCESSORIES:  Stitched Shapes Dies, Layering Circles Dies, Birthday Dies (retired), Magnetic Platform, Big Shot, Subtles Embossing Folder, Dimensionals, Rhinestones, Glue Dots

Here is the inside of Card One: 


As with the first group of cards, I stamped the little flower from the Magnolia Blooms stamp set using Soft Suede ink and colored it using the markers.

CARD TWO:


STAMPS:  Rooted in Nature, Magnolia Blooms

CARDSTOCK:
     Crumb Cake:  5-1/2 x 8-1/2, scored at 4-1/4
     Petal Pink:  3-5/8 x 4-7/8
     Mossy Meadow:  3-1/2 x 3-1/2
     Magnolia Lane DSP:  2-1/4 x 3-1/2 (from DSP cut according to cutting guide)
     SCRAPS:  Whisper White, Petal Pink, Mossy Meadow
     INSIDE:
          Petal Pink:  3-3/4 x 5
          Whisper White:  3-5/8 x 4-7/8

INK:  Mossy Meadow, Soft Suede

BLENDS:  Petal Pink, Mossy Meadow

ACCESSORIES:  Stitched Shapes Dies, Layering Circle Dies, Birthday Dies (retired), Magnetic Platform, Big Shot, Subtles Embossing Folder, Burlap Ribbon, Rhinestones, Dimensionals, Glue Dots

The inside of Card Two looks like this:


I used Soft Suede ink to stamp the little flower from the Magnolia Blooms stamp set and colored it using Petal Pink and Mossy Meadow Blends Markers.

CARD THREE:


STAMPS:  So Sentimental, Magnolia Blooms

CARDSTOCK:
     Crumb Cake:  5-1/2 x 8-1/2, scored at 4-1/4
     Mossy Meadow:  3-5/8 x 4-7/8
     Whisper White:  3-1/2 x 3-1/2
     Magnolia Lane DSP:  2-1/4 x 3-1/2 (from DSP cut according to cutting guide)
     SCRAPS:  Whisper White, Crumb Cake, Mossy Meadow
     INSIDE:
          Mossy Meadow:  3-3/4 x 5
          Whisper White:  3-5/8 X 4-7/8

INK:  Mossy Meadow, Soft Suede

BLENDS:  Petal Pink, Mossy Meadow

ACCESSORIES:  Stitched Shapes Dies, Layering Circles Dies, Birthday Dies (retired), Magnetic Platform, Big Shot, Subtles Embossing Folder, Burlap Ribbon, Dimensionals, Rhinestones, Glue Dots

Inside of Card Three:


I colored the small flower with markers that I stamped with Soft Suede ink in the lower right corner of the inside panel.

CARD FOUR:


STAMPS:  Healing Hugs, Magnolia Blooms

CARDSTOCK:  
     Mossy Meadow:  5-1/2 x 8-1/2, scored at 4-1/4
     Petal Pink:  3-5/8 x 4-7/8
     Crumb Cake:  3-1/2 x 3-1/2
     Magnolia Lane DSP:  2-1/4 x 3-1/2
     SCRAPS:  Whisper White, Petal Pink, Mossy Meadow
          INSIDE:
               Petal Pink:  3-3/4 x 5
               Whisper White:  3-5/8 x 4-7/8

INK:  Mossy Meadow, Soft Suede

BLENDS:  Petal Pink, Mossy Meadow

ACCESSORIES:  Stitched Shapes Dies, Layering Circles Dies, Birthday Dies (retired), Magnetic Platform, Big Shot, Burlap Ribbon, Dimensionals, Rhinestones, Glue Dots


I used Soft Suede ink to stamp the small flower on the inside lower right of the card, then colored it using the Petal Pink and Mossy Meadow markers.  The Soft Suede ink did not run, and it made the flower look softer, more like the flowers in the DSP.

I sure hope you enjoyed these projects!  I hope you will use the cutting guide, Julie's directions, and my directions to make a Double Wonder card set of your own!  Hopefully tomorrow I will post the third set of three cards, and Sunday or Monday I will post the bonus card!

Stay safe and sane (stamping and sending cards helps)!

Happy stamping,
Linda


Tuesday, April 7, 2020

ORNATE STYLE PROJECT!

Hi, Friends,
Hope this finds you doing well.  I got some more cards ready to send out this morning, then helped Doyle with going thru some stuff in the garage.  Then I had a total meltdown.  Yup!  I suspect everybody gets at least one total meltdown during this “shelter-in-place” time.  Anyway, I am trying to put the train back on the tracks and just keep going.  So thought I would share a card with you.  The card uses the brand new Ornate Style stamp set (which will be in the new catalog that is coming soon).  You may have seen the partially finished card I posted on my Facebook Business page (Linda’s Paper Sunshine) a few days ago.  Here are my projects:


On the first card, I used a sentiment from the stamp set "Fable Friends", "glad we're friends".  I used Memento Black ink to stamp the sentiment and cut it out using one of the Stitched Rectangle Dies  and the Big Shot.  


The second version uses a "get well soon" sentiment from the "Timeless Tulips" stamp set found in the January - June mini-catalog.  I also used a Stitched Rectangle Dies and the Big Shot to cut it out.  


The third card uses the sentiment "I miss you a lot" from the stamp set "Seriously The Best" (also from the January - June Mini-Catalog).  I cut it out using a die from the All Dressed Up Dies (January - June Mini Catalog) and the Big Shot.  

I added rhinestones to either side of the sentiment on all three versions.  

Here is the inside of the card:


I used a stamp from the Ornate Style Stamp set, stamped with Memento Black ink, and colored it with Daffodil Delight and Old Olive Blends Markers.

Here is my recipe for the cards:

STAMPS:  Ornate Style, Fable Friends, Timeless Tulips, Seriously The Best

CARDSTOCK:  
     Crumb Cake:  5-1/2 x 8-1/2, scored at 4-1/4
     Daffodil Delight:  4 x 5-1/4
     Whisper White:  3-7/8 x 5-1/8
     Subtles 6 x 6 DSP:  1-1/4 x 5-1/8
          SCRAPS:  Whisper White, Old Olive
          INSIDE:  
               Daffodil Delight:  3-3/4 X 5
               Whisper White:  3-5/8 x 4-7/8

INK:  Memento Black

BLENDS:  Daffodil Delight, Old Olive, Crumb Cake

ACCESSORIES:  Rectangle Stitched Dies, All Dressed Up Dies, Subtle Embossing Folder, Magnetic Platform, Big Shot, Dimensionals, Rhinestones, Braided Burlap Trim

HOW I MADE IT:  
1.  Use Scoreboard to score card base at 4-1/4.  Fold and burnish with a bone folder.

2.  Use Memento Black ink to stamp signature stamp on back of card base.

3.  Stamp flower image using Memento Black ink on lower right corner of inside panel.  Color using markers.

4.  Adhere inside pieces together; adhere to inside of card base.

5.  Emboss the Whisper White Cardstock using the Subtle Embossing Folder and the Big Shot.  Adhere Daffodil Delight Gingham DSP to bottom of panel.  Adhere Braided Burlap Trim at the seam.

6.  Adhere panel to Daffodil Delight Cardstock; adhere to front of card base.

7.  Stamp Daisy image three times on scraps of Whisper White Cardstock using Memento Black ink. Color using markers.  Cut out using Stitched Rectangle Framelits.  Attach to front of card base using Dimensionals.  

8.  Use Memento Black ink to stamp sentiment on scrap of Old Olive Cardstock.  Cut out using Stitched Rectangle Dies and Big Shot.  Attach to card front using Dimensionals.

9.  Add rhinestones (see sample for placement).

Thanks for stopping by today.  I hope you have enjoyed my project!  If you can, go spend some time in your craft space and make a card for someone special!  (And don't forget to mail it!)

Happy stamping,
Linda


Saturday, March 21, 2020

SPECIAL SOMEONE CASE March 2020 Play Day

Hi, Friends,

Today was another cloudy day.  Doyle and I took a walk this morning and again after dinner.  I made Paula Deen's Crockpot Potato Soup for dinner--super yummy--and so very easy!  We worked on rearranging the storage room upstairs, and I worked on my craft room--organizing again.

I am sharing with you today the fourth project from March Play Day.  We used the Special Someone Stamp Set for the card, which is a CASE of a project created by Mary Fish (stampinpretty.com, post dated January 27, 2020).  Here is a picture of my project:


The little raccoon is SO CUTE!  I used the Stone Embossing Folder from the Power of Hope Bundle (SAB) for the Smoky Slate layer.  I also was able to use the Stitched So Sweetly dies from the January - June Mini Catalog (one of my all time favorite dies)!


The sentiment comes from the Itty Bitty Greetings stamp set and is stamped in Real Red, cut out with the Stitched Nested Labels Dies.  I added bling with the Frosted and Clear Enamel Dots.  


On the inside, I stamped the flower with Memento black ink, colored it with Blends markers and added a Metallic Pearl to the center.  

Here is my recipe for this card:

STAMPS:  Special Someone, Itty Bitty Greetings

CARDSTOCK:
     Basic Gray:  5-1/2 x 8-1/2, scored at 4-1/4
     Smoky Slate:  4 x 5-1/4
     Basic Gray:  3-1/2 x 4-1/2
     Whisper White:  2-5/8 x 3-3/4
          SCRAPS:  Whisper White
          INSIDE:  
               Smoky Slate:  3-3/4 x 5
               Whisper White:  3-5/8 x 4-7/8

INK:  Memento Black, Real Red

BLENDS:  Smoky Slate (Light), Real Red (Dark)

ACCESSORIES:  Stitched So Sweetly Dies, Stitched Nested Labels Dies, Special Days Dies, Magnetic Platform, Big Shot, Stone Embossing Folder, Dimensionals, Frosted and Clear Enamel Dots, Metallic Pearls, White Gel Pen (non-SU).  

HOW I MADE IT:

1.  Use the Scoreboard to score the Basic Gray card base at 4-1/4.  Fold and burnish the card base with bone folder.
2.  Use Memento black ink to stamp signature stamp on back of card base.
3.  Stamp flower using Memento black ink on lower right corner of inside panel.  Color using marker.  Add silver metallic pearl to center of flower.
4.  Adhere inside panels together; adhere to inside of card base.
5.  Use Stone Embossing Folder and Big Shot to emboss Smoky Slate Cardstock.  Adhere the embossed cardstock to front of card base.
6.  Use Memento black ink to stamp the raccoon on lower left corner of Whisper White cardstock.  Color using marker.  Add balloon strings by stamping the with Memento black ink.
7.  Die cut a scalloped rectangle from Basic Gray using the Stitched So Sweetly Dies (use the largest die).  Adhere the stamped panel to Basic Gray scalloped die cut.  Attach to card front using dimensionals.
8.  Stamp two heart balloons using Memento black ink on scrap of Whisper White cardstock.  Color using marker.  Use white gel pen to add small streak of white on each balloon.  Cut out balloons using framelit (Special Days Dies) and Big Shot.  Adhere one balloon to card front; attach second balloon to card front using dimensionals.
9.  Use Real Red ink to stamp sentiment on scrap of Whisper White cardstock.  Cut out using framelit (Stitched Nested Labels) and Big Shot.  Adhere to card front (see sample for placement).
10.  Add Clear Epoxy Droplets to sentiment panel (see sample for placement).

Thanks for stopping by today.  I hope you are having a wonderful weekend.  In these crazy days when we are all "social distancing", consider making a card and sending it to someone special to make their day!  After all, who doesn't like HAPPY MAIL!

Happy stamping,
Linda