Showing posts with label Fun Fold Card. Show all posts

Sunday, May 17, 2020

Double Wonder Group Three!

Hi, Friends,
I certainly had fun yesterday—I signed up for an online card class put on by two Stampin’ Up! Demos.  They had several different classes but my favorite was the Mystery Stamping.  They gave us a few directions, then said to make a card and post it.  It was fun to see how different people used the same directions to make such different cards!  I have posted a Mystery Stamping Challenge on my Facebook Business Page—Linda’s Paper Sunshine—so come join us.  The first time can be a bit intimidating, but just relax and enjoy.  It was hard for me the first time I tried it, too, but it is good to stretch yourself a bit.  If we have three or more people participate I will randomly draw a name to receive a special prize (I love to give prizes)!

Today, I want to share with you the last group of four cards from the Double Wonder card set.  Here is a picture of the group:
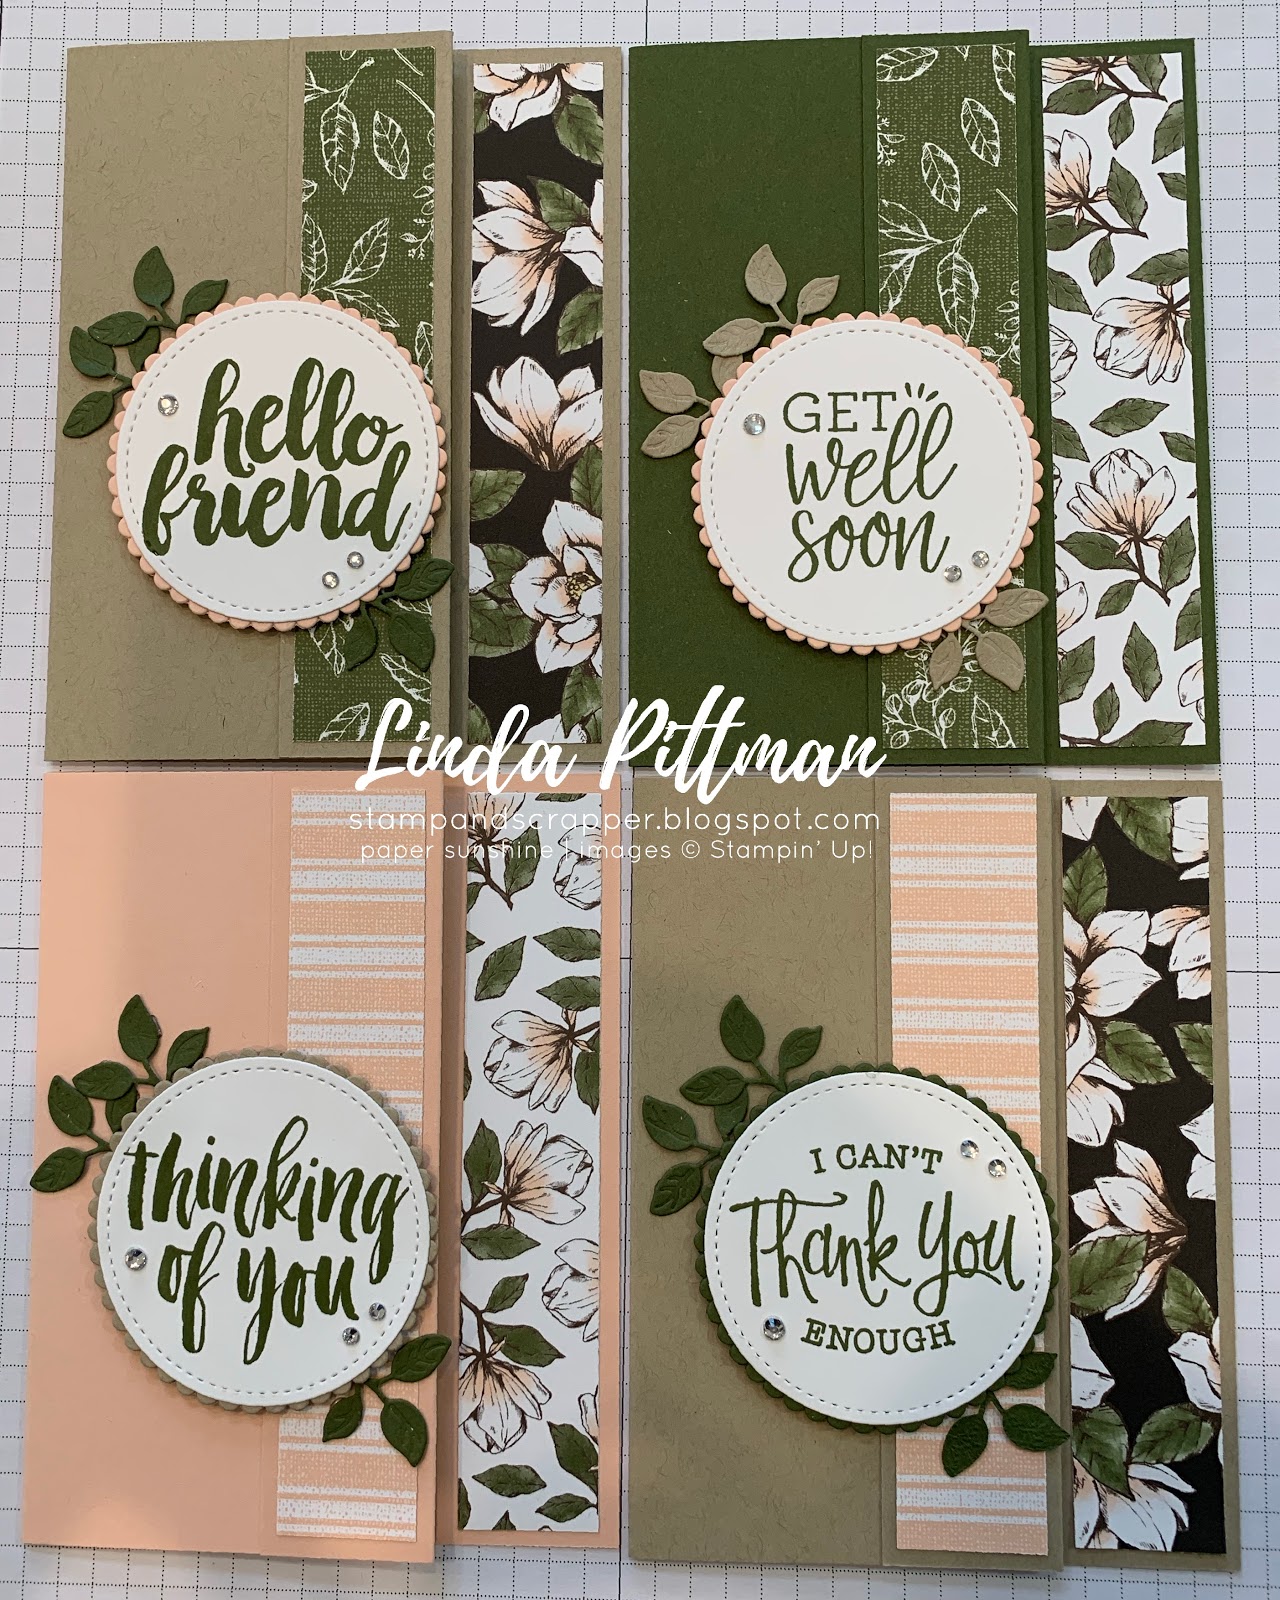


These cards are actually a fun fold; it is a regular 5-1/2 x 8-1/2 card scored at 4-1/4, then scored at 1-1/4 and folded back to the front.  You can either leave the little flap loose, or you can adhere it down; I chose to adhere it to the card front.  This group of cards uses the 1" x 5-1/4" strips from the middle section of the cutting guide.  The shorter strip at the bottom is used on Group Two of the cards.  

Decide how you want to use the strips on the cards; after you have divided them out, one strip is adhered to the inside of the card base, a second strip is adhered to the 1-1/4" panel that has been folded back onto the card front.  I have taken a couple of pictures of the card standing up so you can see what it looks like:


and a second picture of the card standing up:


I have pictures of each of the cards and will give you dimensions for each card.

CARD ONE:


and the inside picture of Card One:


RECIPE FOR CARD ONE:

STAMPS:  Healing Hugs, Magnolia Blooms

CARDSTOCK:
     Mossy Meadow:  5-1/2 x 8-1/2, scored at 1-1/4 and 4-1/4
     Magnolia Lane DSP:  1 x 5-1/4 (already cut according cutting guide)
     SCRAPS:  Crumb Cake, Petal Pink, Whisper White
     INSIDE:  
          Petal Pink:  2-3/4 x 5-1/4 (cut two)
          Whisper White:  2-5/8 x 5-1/8 (cut two)


INK:  Mossy Meadow, Soft Suede

BLENDS:  Petal Pink, Mossy Meadow

ACCESSORIES:  Stitched Shapes Dies, Layering Circles Dies, Birthday Dies (Retired), Magnetic Platform, Big Shot, Rhinestones, Dimensionals, Glue Dots

CARD TWO:


inside of Card Two:


RECIPE FOR CARD TWO:

STAMPS:  Rooted in Nature, Magnolia Blooms

CARDSTOCK:  
     Petal Pink:  5-1/2 x 8-1/2, scored at 1-1/4 and 4-1/4
     Magnolia Lane DSP:  1 x 5-1/4 (pieces already cut according to cutting guide)
     SCRAPS:  Mossy Meadow, Crumb Cake, Whisper White
     INSIDE: 
          Mossy Meadow:  2-3/4 x 5-1/4 (cut two)
          Whisper White:  2-5/8 x 5-1/8 (cut two)


INK:  Mossy Meadow, Soft Suede

BLENDS:  Petal Pink, Mossy Meadow

ACCESSORIES:  Stitched Shapes Dies, Layering Circles Dies, Birthday Dies (retired), Magnetic Platform, Big Shot, Dimensionals, Rhinestones, Glue Dots

CARD THREE:


inside of Card Three:


RECIPE FOR CARD THREE:

STAMPS:  So Sentimental, Magnolia Blooms

CARDSTOCK:
     Crumb Cake:  5-1/2 x 8-1/2, scored at 1-1/4 and 4-1/4
     Magnolia Lane DSP:  1 x 5-1/4 (from DSP cut according to cutting guide)
     SCRAPS:  Mossy Meadow, Whisper White
          INSIDE:
               Mossy Meadow:  2-3/4 x 5-1/4 (cut two)
               Whisper White:  2-5/8 x 5-1/8 (cut two)

INK:  Mossy Meadow, Soft Suede

BLENDS:  Petal Pink, Mossy Meadow

ACCESSORIES:  Stitched Shapes Dies, Layering Circles Dies, Birthday Dies (retired), Magnetic Platform, Big Shot, Rhinestones, Dimensionals, Glue Dots

CARD FOUR:

inside of Card Four:


RECIPE FOR CARD FOUR:

STAMPS:  Seriously the Best, Magnolia Blooms

CARDSTOCK: 
     Crumb Cake:  5-1/2 x 8-1/2, scored at 1-1/4 and 4-1/4
     Magnolia Lane DSP:  1 x 5-1/4 (from DSP already cut according to cutting guide)
     SCRAPS:  Petal Pink, Mossy Meadow, Whisper White
     INSIDE:
          Mossy Meadow:  2-3/4 x 5-1/4 (cut two)
          Whisper White:  2-5/8 x 5-1/8 (cut two)

INK:  Mossy Meadow, Soft Suede

BLENDS:  Petal Pink, Mossy Meadow

ACCESSORIES:  Stitched Shapes Dies, Layering Circle Dies, Birthday Dies (retired), Magnetic Platform, Big Shot, Rhinestones, Dimensionals, Glue Dots

So we have the dimensions and pictures for twelve of the cards now; tomorrow I will finish this up by showing you the Bonus Card!  

Thanks so much for stopping by!  I REALLY miss you guys; hope you are safe and well, and have an awesome week this week!

Happy stamping,
Linda


Wednesday, August 14, 2019

Free As A Bird Fun Fold Card!

Hi, Stamping Friends,

We just returned from a weekend trip to Grand Marais, Minnesota.  It is a quaint little town located on the north shore of Lake Superior that has awesome food, relaxing atmosphere and the best pie and frozen custard ever!  We saw a beautiful rainbow as we were waiting for a table at the Angry Trout restaurant.  The unique thing was that it wasn’t raining at the time.


But I also wanted to share with you this fun fold card we made using the Free As A Bird stamp set at our August Play Day:


When the small flap is opened, it looks like this:


And when the other flap is open, it looks like this:


It is easy to make this card.  First, I adhered the "birdcage" DSP to the Whisper White card stock panel.  I adhered that panel to the Old Olive panel.  Then I used a strong adhesive (Tear and Tape) to adhere the small portion of the small flap to the back of the Old Olive panel.  It will look like this from the front:


and like this from the back:


Then add your adhesive to the Old Olive panel and adhere to the card base.  It will look like this from the front:


and this from the back:


You are now ready to decorate the card as you desire.

CARD RECIPE:

     STAMPS:  Free As A Bird

     CARDSTOCK:
          Card Base:
               Crumb Cake:  5-1/2 x 8-1/2, scored at 4-1/4
               Old Olive:  4 x 5-1/4
               Whisper White:  3-7/8 x 5-1/8
               Bird Ballard DSP:  1-1/2 x 5-1/8
          Small Flap:
               Crumb Cake:  3 x 4-1/4, scored at 1-1/4
               Old Olive:  2-3/4 x 2-3/4 (cut two)
               Scrap:  Whisper White (cut out with Stitched Shape Square framelit)
          Outside Front:
               Old Olive:  2-1/2 x 5-1/4
               Bird Ballard DSP:  2-3/8 x 5-1/8

     INK:  Memento Black

     BLENDS:  Old Olive, Soft Suede, Daffodil Delight (D), Petal Pink, Pool Party, Calypso Coral (L)

     ACCESSORIES: 
          Rhinestones
          Stitched Shapes Framelits
          Magnetic Platform
          Big Shot

Please notice that I did NOT use dimensionals on this card!  It is one of the few cards that I haven't used dimensionals on, so I thought I would point that out!

HOW I MADE IT:
1.  Use Memento Black ink to stamp signature stamp on back of card base.
2.  Adhere birdcage paper to Whisper White card stock; adhere to Old Olive card stock.
3.  Adhere 1-1/4" panel of smaller Crumb Cake panel to back of larger Old Olive panel.  Adhere Old Olive panel to inside of card base.
4.  Cut one stitched shape square using a scrap of Whisper White card stock and Big Shot.  Stamp flower image in lower left corner using Memento black ink.  Color flower image with markers.
5.  Adhere stamped image to Old Olive cardstock.  Adhere to inside of small Crumb Cake flap.
6.  Stamp bird image on scrap of Whisper White card stock using Memento black ink.  Cut out using square framelit and Big Shot.  Stamp sentiment using Memento black ink.  Color with markers.
7.  Adhere stamped image to Old Olive square; adhere to front of small Crumb Cake flap.
8.  Adhere flowered DSP to Old Olive cardstock.  Adhere to front of card base.
9.  Add rhinestones next to sentiment.

See picture images above to help you with assembling the card.

Thanks for stopping by today.  Hope you enjoyed the card!

Happy stamping,
Linda


Wednesday, October 23, 2013

September 2013 Play Day Projects, Project Three

Hello friends,

Just wanted to share another of our September Play Day projects with you.  This one uses the Circle Thinlit Framelit set, which is now available from Stampin Up.  It is really fun and easy to use!  Here is our project:


This card is very pretty, the ornament and scalloped circle are popped up with dimensionals.  Here is another view:


The white section gives you a nice place to write a message or to just sign your name.  The third vies of this card, which shows the back of the circle with the stamped sentiment:


My recipe for this card:

STAMPS:  Christmas Collectibles, Wishing You

CARDSTOCK: 
     Cherry Cobbler:  5-1/2 x 8-1/2
     Old Olive:  2-1/4 x 5-1/4
     Season of Style DSP:  2-1/8 x 5-1/8
     Baked Brown Sugar:  2-1/4 x 5-1/4
     Whisper White:  2-1/8 x 5-1/8
     Season of Style DSP:  5-1/2 x 5-7/8
     Scraps:  Baked Brown Sugar, Old Olive, Whisper White

INK:  Soft Suede, Cherry Cobbler

MARKERS:  Old Olive, Cherry Cobbler, Baked Brown Sugar

ACCESSORIES:  Circle Card Thinlits, Circle Framelits, Big Shot, 2-1/2 Circle Punch, 2-3/8 Circle Scallop Punch, Paper Piercer, Mat Pack, Dimensionals, Linen Thread, Sponge, Christmas Ornament Punch

I used the instructions from Jan Tinklenberg's excellent tutorial for making the panels for the Circle Card Thinlit Die, which can be found on her blog.

Thanks for stopping by!

Happy stampin and scrappin,
Linda