Hi, Friends,
Try saying that three times fast (the post title)! As promised, I am sharing with you today two cards that could be made with the Ornate Garden Suite Sampler. These cards do not use the Ornate Style or the Ornate Thanks stamp sets. I did this purposefully so that you could see that you could make a beautiful card even if you don’t own the stamp set!
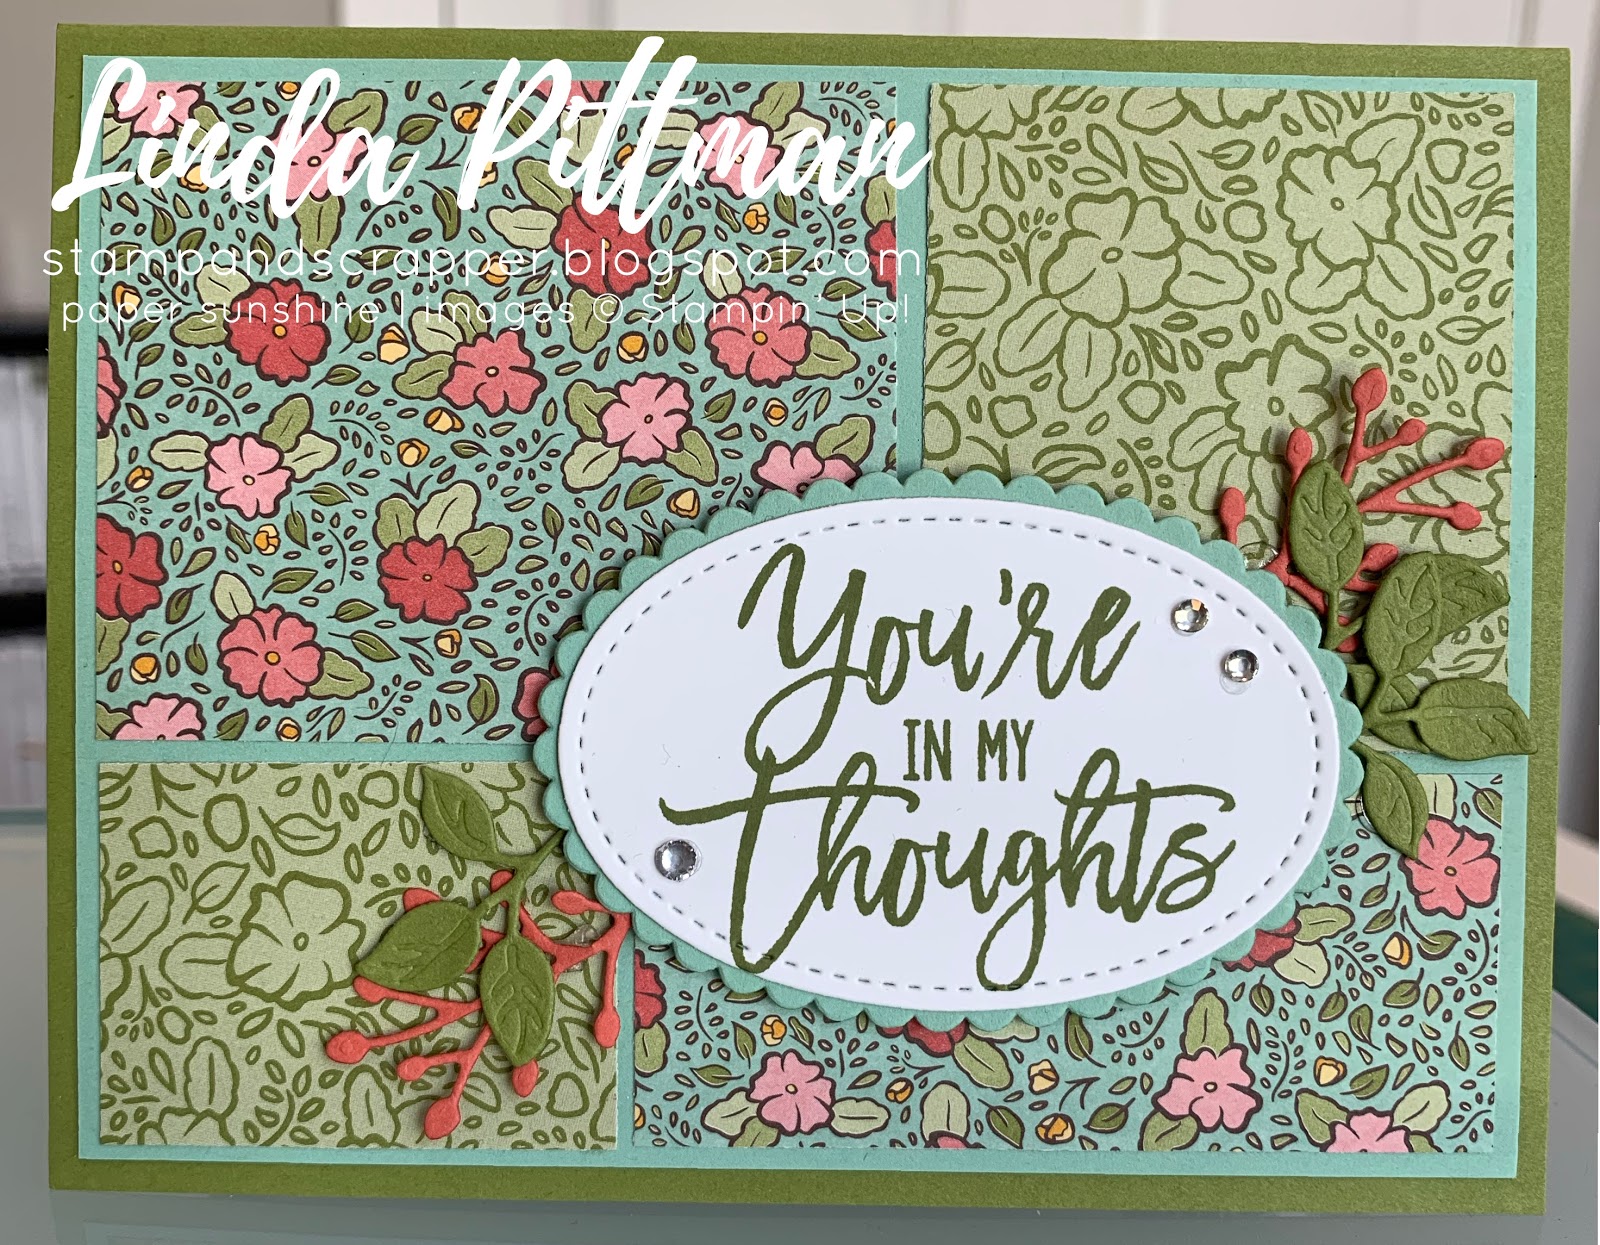
Here is my first card:
My recipe for this card:
STAMPS: Thoughtful Branches (Retired)
CARDSTOCK:
Old Olive: 5-1/2 x 8-1/2 scored at 4-1/4
Mint Macaron: 4-1/4 x 5
Ornate Garden DSP: 3-7/8 x 3-7/8
Ornate Garden DSP: 1-1/2 x 3-7/8
SCRAPS: Mint Macaron, Whisper White, Terracotta Tile
INSIDE:
Mint Macaron: 3-3/4 x 5
Whisper White: 3-5/8 x 4-7/8
INK: Old Olive
ACCESSORIES: Stitched Shapes Dies, Ovals Layering Dies, Birthday Dies (Retired), Magnetic Platform, Big Shot, Old Olive/Pretty Peacock Reversible Ribbon, Dimensionals, Rhinestones, Glue Dots
Here is a closer picture of the sentiment. If you don't have the same dies, use what you have! The same goes for the die cut pieces behind the sentiment--if you don't have the Birthday Dies, use something that you already have.
HOW TO MAKE IT:
1. Use scoring tool to score the card base at 4-1/4. Fold the card and burnish the fold with a bone folder.
2. Use Old Olive ink to stamp a signature stamp on the back of your card base.
3. Stamp the leaf from the Thoughtful Branches set on the lower right corner of the inside panel using Old Olive ink.
4. Adhere the inside panels together; adhere to inside of card base.
5. Adhere the square DSP panel to the top of the Mint Macaron cardstock. Adhere the smaller rectangle DSP panel to the bottom of the Mint Macaron cardstock. Adhere ribbon to the seam of the DSP.
6. Adhere the above panel to the front of the card base.
7. Use Old Olive ink to stamp the sentiment on a scrap of Whisper White cardstock. Cut out using the Stitched Shapes Dies, Magnetic Platform, and Big Shot.
8. Cut out scalloped oval from scrap of Mint Macaron cardstock using Layering Ovals Dies, Magnetic Platform, and Big Shot. Adhere the stamped sentiment oval to the scalloped oval.
9. Cut out leaves and sprigs from Old Olive and Terracotta Tile cardstock scraps, using Birthday Dies, Magnetic Platform and Big Shot.
10. Lay sentiment oval on card front in approximately the place you will adhere it. Add glue dots to leaves and attach them to the card front, taking care to place them where you like the way they look and show when the sentiment oval is attached to the card front.
11. Attach sentiment oval to card front using dimensionals.
12. Add rhinestones. See sample for placement.
CARD TWO:
Card Two uses most of the same products as Card One, but is laid out with a different orientation (landscape vs. portrait) and has different cuts of the DSP:
My recipe for this card:
STAMPS: Thoughtful Branches (Retired)
CARDSTOCK:
Old Olive: 5-1/2 x 8-1/2, scored at 4-1/4
Mint Macaron: 4-1/4 x 5
Ornate Garden DSP: 2-3/8 x 2-7/8
Ornate Garden DSP: 2-1/8 x 2-3/8
Ornate Garden DSP: 1-3/8 x 1-7/8
Ornate Garden DSP: 1-3/8 x 3-1/8
SCRAPS: Mint Macaron, Whisper White, Old Olive, Terracotta Tile
INSIDE:
Mint Macaron: 3-3/4 x 5
Whisper White: 3-5/8 x 4-7/8
INK: Old Olive
ACCESSORIES: Stitched Shapes Dies, Ovals Layering Dies, Birthday Dies (Retired), Magnetic Platform, Big Shot, Dimensionals, Rhinestones, Glue Dots
This is a larger picture of the sentiment panel:
And this is a picture of the inside of the card:
HOW I MADE IT:
1. Use scoring tool to score card base at 4-1/4. Fold card and burnish with a bone folder.
2. Use Old Olive ink to stamp signature stamp on back of card base.
3. Stamp leaf from Thoughtful Branches stamp set on lower right corner of inside card panel.
4. Adhere inside panels together; adhere to inside of card base.
5. Adhere DSP panels to Mint Macaron cardstock. See sample for placement.
6. Adhere above panel to front of card base.
7. Use Old Olive ink to stamp sentiment on scrap of Whisper White cardstock. Cut out using Stitched Shapes Dies, Magnetic Platform, and Big Shot.
8. Cut scalloped oval from scrap of Mint Macaron cardstock using Layering Oval Dies, Magnetic Platform, and Big Shot.
9. Adhere stamped sentiment oval to the scalloped oval.
10. Cut leaves and sprigs from Old Olive and Terracotta Tile cardstock scraps, using the dies from Birthday Dies, Magnetic Platform, and Big Shot.
11. Lay stamped sentiment oval in the approximate position you will adhere it to later. Add glue dots to leaves and sprigs, and adhere them to the card front, paying attention to the position of the stamped sentiment oval.
12. Use dimensionals to adhere the stamped sentiment oval to the front of the card base.
13. Add rhinestones; see sample for placement.
If you want to see what the Ornate Garden Suite Sampler looks like, here is a quick picture! I added a tag and listed the coordinating colors of the Ornate Garden DSP for your convenience! The little flower on the tag is from the Ornate Style Stamp Set, colored with Mint Macaron and Old Olive Blends.
If you need more information about the Suite Samplers, please see my post from yesterday (June 4, 2020).
Hope this gives you a couple of ideas about how you can use the contents of a Suite Sampler to make some awesome cards! I will be back soon with some more possibilities!
Have an amazing weekend--hope it includes a bit of crafting!
Happy stamping,
Linda