Showing posts with label Teeny Tiny Wishes. Show all posts

Thursday, May 30, 2013

Dapper Dad May Play Day Project

We used the Boutique Boxes Kit just a bit differently to make a box for Father's Day.  The project would easily adapt to a birthday or retirement project.

 
A side view looks like this:


This was a CASE of a project pictured in the Spring Mini Catalog, and also someone posted a project using the two Hershey's bars (I hunted unsuccessfully to find who it was).  Here is my recipe:

STAMPS:  Dapper Dad, Teeny Tiny Wishes

CARDSTOCK:
     Comfort CafĂ© DSP:  2-1/4 x 3-1/2
     Scraps:  Old Olive, Crumb Cake

INK:  Old Olive, Soft Suede

ACCESSORIES:  Bitty Banners Framelits, Linen Thread, Dimensionals, Glue Dots, Stampin Distress Tool, Sticky Strip, Sponge, Hershey bars, Boutique Boxes Kit

Thanks for stopping by!

Happy stampin and scrappin,
Linda

Monday, March 25, 2013

Swallowtail March Play Day Project

Hello, friends!  Just wanted to share our fourth project from March Play Day with you today.  It is a CASE of a card I found on Lydia Fiedler's blog, Understand Blue, in her February 1, 2013 post.  She has a detailed video showing how she made the card.


Here is my recipe for the card:

STAMPS:  Swallowtail, Teeny Tiny Wishes

CARDSTOCK:
     Very Vanilla:  5-1/2 x 8-1/2, scored at 4-1/4
     First Edition DSP:  4 x 5-1/4
     Scraps:  Very Vanilla

INK:  Kraft Basic Black, Tangerine Tango, Pumpkin Pie, Daffodil Delight, Crumb Cake

ACCESSORIES:  Modern Label Punch, Word Window Punch, Paper Piercer, Mat Pack, Very Vanilla Brads, Black Embossing Powder, Heat Gun, Aqua Painter, Gesso (non-SU), Sponge Brush (non-SU).

Basically, we painted the First Edition DSP with Gesso, let it dry, then heat embossed the Swallowtail stamp with black embossing powder and painted it with reinkers.  It was easier than it looks!

Thanks for stopping by!

Happy stampin and scrappin,
Linda

Tuesday, February 26, 2013

Make A Cake Convention 2012 Swap Card

This card has been sitting in my craft room for a while, but I wanted to share it with you today.  I believe we also made it at a Play Day soon after the new catalog was released.


 The inside looks like this:

The Primrose Petals "shadow" behind the Apothecary Accent framelit was easy to make.  We adhered a piece of cardstock 1-5/8 x 3-1/8 behind the rectangle portion of the framelit, then punched two 1" circles with a circle punch and adhered them behind the ends!

Here is my recipe:

STAMPS:  Make a Cake, Teeny Tiny Wishes, Bring on the Cake

CARDSTOCK: 
     Midnight Muse:  5-1/2 x 8-1/2, scored at 4-1/4
     Primrose Petals:  3-1/2 x 4-3/4 (2)
     Whisper White:  3-3/8 x 4-5/8 (2)
     Primrose Petals:  1-5/8 x 3-1/8
     Patio Party DSP:  1-3/4 x 3-3/8
     Scraps:  Whisper White, Primrose Petals, Midnight Muse

INK:  Midnight Muse, Summer Starfruit, Primrose Petals

MARKERS:  Primrose Petals, Baja Breeze

ACCESSORIES:  Apothecary Accents Framelits, Big Shot, Dotted Scallop Ribbon Border Punch,, White Baker's Twine, Dimensionals, Jewelry Tag Punch, Glue Dots, Dimensionals, Mat Pack, Paper Piercer, Beautiful Wings Embosslit, 1" Circle Punch

Thanks for stopping by!

Happy stampin and scrappin,
Linda


Wednesday, February 13, 2013

More Amour Valentine Card from January Play Day!

Just sharing another card from our January Play Day today!  This card uses the Faux Pinwheel technique.  Dawn Olchefski has a wonderful video showing how to create this look on her blog.


My recipe:

STAMPS:  Teeny Tiny Wishes

CARDSTOCK: 
     Pool Party:  5-1/2 x 8-1/2, scored at 4-1/4
     Primrose Petals:  3-7/8 x 5-1/8
     More Amore DSP:  3-3/4 x 5
     Pool Party:  3-1/2 x 3-1/2
     Primrose Petals:  2-5/8 x 2-5/8 (2 pieces)
     More Amore DSP:  1-1/4" x 1-1/4"
     Scraps:  Primrose Petals, Very Vanilla

INK:  Crumb Cake, Primrose Petals

ACCESSORIES:  Scallop Square Duo Die, Big Shot, Paper Piercer, Mat Pack, Boho Blossoms Punch, Pool Party Brads, Sponge. Word Window Punch, Glue Dots

Thanks for stopping by!

Happy stampin and scrappin,
Linda

Sunday, February 19, 2012

Bright and Cheerful Birthday Card: February Play Day Project One

We made some birthday cards in February, and this one was my favorite.  It is so bright and cheerful, and is easy to make!  Here is a picture:

 I saw an awesome card by Mary Fish and used her idea to make the packages.  It is hard to see, but there are some score lines on the white panel behind the "presents" that I made with my Simply Scored tool.

Here is another view:


And here is my recipe for the card:

STAMPS:  Teeny Tiny Wishes, On Your Birthday, Short & Sweet, Sweets for the Sweet

CARDSTOCK:
     Whisper White:  5-1/2 x 8-1/2 scored at 4-1/4
     Real Red:  3-1/2 x 5
     Whisper White:  3-3/8 x 4-7/8
     Scraps:  Real Red, Old Olive, Tempting Turquoise, Big Top Birthday DSP
     INSIDE:
          Real Red:  3-1/2 x 5
          Whisper White:  3-3/8 x 4-7/8

INK:  Tempting Turquoise

MARKERS:  Old Olive, Real Red

ACCESSORIES:  Blossom Bouquet Triple Layer Punch, 1-1/4 Square Punch, 1-3/8 Square Punch, Simply Scored, Dimensionals, Brights Brads, Paper Piercer, Mat Pack

Thanks for stopping by!

Happy stampin and scrappin,
Linda

Sunday, August 21, 2011

Snow Much Fun Swap Card!

This is a card I created for a Christmas card swap I recently participated in:

I just love the Funky Fold, and when I saw the tall snowman from the Snow Much Fun stamp set, I knew he was perfect for this card!

Here is a picture of the inside of this card:

I used the Funky Fold directions found on Laura Lipe's blog at http://smileslaura.blogspot.com/2011/03/leprachaun.html.  They are easy to follow and it makes a really fun card!

Here is my recipe for this card:

STAMPS:  Snow Much Fun, Teeny Tiny Wishes

CARDSTOCK:
     Baja Breeze 4-1/4 x 11 (follow directions for Funky Fold cuts and scores)
     Watercolor Paper 2 x 4-3/8
     Rich Razzleberry 2-1/8 x 4-1/2
     Pocketful of Posies DSP 3/4 x 4 (bottom strip), 3/4 x 3/4 (corners), 3/4 x 4-3/8 (side strips)
     Rich Razzleberry 3-3/4 x 4
     Watercolor Paper 3-5/8 x 3-7/8
     Scraps:  Rich Razzleberry, Baja Breeze, Watercolor Paper

INK:  Stazon Black, Pumpkin Pie, Baja Breeze, Rich Razzleberry, Basic Gray, Crumb Cake

ACCESSORIES:  Aqua Painter, Mat Pack, Paper Piercer, Rich Razzleberry Brads, Dimensionals, Word Window Punch, Modern Label Punch, Tasteful Trim Die, Big Shot

Thanks so much for stopping by!

Happy stampin and scrappin,
Linda


Wednesday, June 29, 2011

Open Seas Easel Father's Day Card

This card was one of the projects we made at my May Play Day.  It uses the Open Seas stamp set from the Summer Mini Catalog. 

I used individual stamps from the Open Seas set to stamp the Crumb Cake and Marina Mist cardstock. 

Here is my recipe:

STAMPS:  The Open Sea, Teeny Tiny Wishes

CARDSTOCK: 
     Crumb Cake:  5-1/4 x 8-1/2, score at 4-1/4 and 6-3/8
     Crumb Cake:  4-1/'4 x 4-1/4
     Cajun Craze: 2-7/8 x 2-7/8
     Not Quite Navy:  1-3/8 x 1-3/8 (4)
     Marina Mist:  1-1/4 x 1-1/4 (4)
     Cajun Craze:  3-3/4 x 3-3/4
     Not Quite Navy:  3-5/8 x 3-5/8
     Whisper White:  3-1/2 x 3-1/2
     Scraps:  Whisper White, Cajun Craze

INK:  Crumb Cake, Marina Mist, Not Quite Navy

ACCESSORIES:  1-1/4 Square Punch, 1-3/8 Square Punch, Decorative Label Punch, 1-3/4 Circle Punch, 1-3/4 x 7/8 Oval Punch, Oval Scallop Punch, Paper Piercer, Mat Pack, Metallic Brads, Sticky Strip, Dimensionals

The medallion behind the circle with the ship on it is actually two punches from the Decorative Label Punch that are crossed and adhered together. 

Thanks for looking!

Happy stampin and scrappin,
Linda

Monday, May 23, 2011

Paisley Petals DSP and Four Frames Thinking of You Card!

This card was another project for our April Play Day, and it uses the Paisley Petals DSP, which was a preview from the new 2011-2012 catalog, and the Four Frames stamp set, also a preview.  This is beautiful DSP, and fun to use with the Four Frames, as well as being a fast card, since there isn't much stamping on it.  Here is a picture:


My recipe for this card:

STAMPS:  Four Frames, Teeny Tiny Wishes

CARDSTOCK: 
     Marina Mist:  4-1/4 x 11, scored at 5-1/2
     Pear Pizzazz:  3-7/8 X 5-1/8
     Paisley Petals DSP:  1-1/2 x 3-3/4, and 3-5/8 x 3-3/4
     Whisper White:  3-3/4 x 5

MARKERS:  Marina Mist, Pear Pizzazz, Cherry Cobbler

ACCESSORIES:  Corner Rounder Punch, Decorative Label Punch, 1/2" Cherry Cobbler Seam Binding Ribbon, SAMJ, Dimensionals

Thanks for looking!

Happy stampin and scrappin,
Linda

Saturday, May 21, 2011

Twisted Easel Birthday Card!

Today I want to share with you a card I made for my son-in-law's birthday.  I had been seeing twisted easel cards, and really wanted to try one, and since I had made a fancy fold for several other family members' birthdays, I decided to try one.  Here is a picture of my finished card:


I love the Celebrations Designer Series paper--it makes such bright and cheerful cards!  It made choosing the colors for the card so easy!  I also have a picture of the card opened:


Here is my recipe for this card:

STAMPS:  Crazy for Cupcakes, Teeny Tiny Wishes
CARDSTOCK: 
     Pacific Point:  4-1/4 x 11, scored at 5-1/2
          cut off 1-1/4" from the bottom of the front; score diagonally from center of card to bottom edge
     Real Red:  4 x 4, cut in half diagonally
     Celebrations DSP:  3-5/8 x 3-5/8, cut in half diagonally
     Real Red:  3-3/4 x 3-3/4 (scallop circle)
     Whisper White:  3-1/2 x 3-1/2 (3" circle)
     Real Red:  1-1/8 x 4-1/8
     Celebrations DSP:  1 x 4
     Real Red:  3-3/4 x 3-3/4
     Whisper White:  3-5/8 x 3-5/8
     Scraps:  Whisper White, Pacific Point, Bashful Blue, Real Red, Daffodil Delight
INK:  Basic Black, Pacific Point
ACCESSORIES:  1-3/8 X 5/8 Oval Punch, 1-3/4 x 7/8 Oval Punch, Oval Scallop Punch, Old Olive brads, Paper Piercer, Mat Pack, Dimensionals, Circle Scallop #2 Die, 3" Circle Die, Big Shot, Paper Snips

I based this card on the instructions found in Beth Crocker's wonderful tutorial video found at http://southerninkerbelles.blogspot.com/2011/02/easel-card-with-a-twist-video-tutorial.html

Thanks for looking!

Happy stampin and scrappin,
Linda

Sunday, May 1, 2011

Thinking of You March Play Day Project

This was the third project for March Play Day.  It is really a very simple card:


Here is my card recipe:

STAMPS:  God's Blessing (inside sentiment), Teeny Tiny Wishes
CARDSTOCK: 
     Baja Breeze:  4-1/4 x 11, scored at 5-1/2
     Whisper White:  4 x 5-1/4
     Whisper White:  3-3/4 x 5 (inside)
     Scraps:  Baja Breeze, Whisper White
INK:  Baja Breeze
ACCESSORIES:  Elegant Lines Embossing Folder, Big Shot, Word Window Punch, Modern Label Punch, 3/8 Whisper White Taffeta Ribbon, Basic Pearls, Dimensionals, Corner Rounder Punch

Thanks for looking!

Happy stampin and scrappin,
Linda

Saturday, January 8, 2011

January Play Day Projects!

This morning was our January Play Day, and we had a great time creating four projects.  Since next month is Valentine's Day, all of the projects were about Valentine's Day.

PROJECT ONE: 


This card was based on a Mojo Monday Sketch from this past week (#172), and was a CASE of a card by Mary Fish, which can be found at http://www.stampinpretty.com/2011/01/to-mojo-with-love.html.  I fell in LOVE with her card, and made a few changes to make it my own.  I love the new red glitter paper from Stampin Up; it makes "bling" easy!  It is hard to see in the picture, but the silver heart is embossed with silver embossing powder, and it is stacked on a red heart that was cut out with the heart embosslit and has lots of tiny scallops.

Here is my recipe:

STAMPS:  Filled With Love
CARDSTOCK:
     Whisper White 5-1/2 x 8-1/2, score at 4-1/4
     Whisper White 4 x 5-1/4
     Basic Black 1 x 4-1/4
     Red Glimmer Paper 2-1/2 x 2-1/2
     Scraps:  Basic Gray, Whisper White, Red Glimmer Paper
INK:  Versamark, Real Red, Basic Gray
ACCESSORIES:  Basic Black brads, Scalloped Heart of Hearts embosslit die, Big Shot, Heart to Heart Punch, Paper Piercer, Mat Pack, Dimensionals, Silver Embossing Powder, Heat Gun, 2-1/2 Circle Punch

PROJECT TWO:


One of the cards in the 2010-2011 Stampin Up catalog is very similar to this, and from the time I first saw it, I knew I wanted to make it at a Play Day.  I changed it up a bit to make it mine, and like the way it turned out and love the color combo!

My recipe for this card is:

STAMPS:  Sweetheart
CARDSTOCK:
     Crumb Cake 5-1/2 X 8-1/2 scored at 4-1/4
     Baja Breeze 3-1/8 x 5-1/8
     Crumb Cake 3 x 5
     Baja Breeze 1-1/2 x 3
     Scraps:  Real Red and Old Olive
INK:  Old Olive, Basic Black
ACCESSORIES:  Perfect Polka Dot Embossing Folder, Big Shot, Bitty Buttons, Mini Glue Dot, Linen Thread, 1/4 Old Olive grograin ribbon, Dimensionals, Perfect Details Texture Plate, Scallop Border Punch, Heart Punch, Small Heart Punch.

PROJECT THREE:


This card was my own creation; I was thinking of something different for a Valentine's Day card and thought that On A Pedestal would make a great Valentine's Day card!  I LOVE the bright colors and the cupcakes make me hungry.  The picture doesn't show it well, but the cupcakes are popped up on dimensionals, and the "flowers" are punches out with Itty Bitty Shape punches and attached with brads.  Here is my recipe:

STAMPS:  On A Pedestal, Teeny Tiny Wishes, Crazy for Cupcakes (inside sentiment)
CARDSTOCK: 
     Pretty in Pink 5-1/2 x 8-1/2 scored at 4-1/4
     Real Red 5-1/8 x 1-7/8
     Love Patterns DSP 1-3/4 x 5
     Early Espresso 1-1/2 x 1-1/2
     Scraps of Whisper White, Real Red, Pretty in Pink
INK:  Real Red
MARKERS:  Real Red, Early Espresso, Pretty in Pink
ACCESSORIES:  Real Red and Pretty in Pink brads, Itty Bitty Shapes punch pack, 1-3/8 square punch, Paper Piercer, Mat Pack, Real Red 1/8 taffeta ribbon, Dimensionals

PROJECT FOUR: 

We couldn't have Valentine's Day projects without some kind of chocolate, so we made a small holder for some Hershey's chocolate chunks.  We wrapped them in DS paper and attached them with glue dots.


My recipe for this project:

STAMPS:  Filled With Love
CARDSTOCK:
     Pretty in Pink, Real Red, Whisper White, and Love Patterns DS Paper
INK:  Real Red
ACCESSORIES:  Jumbo Pewter Eyelet, Crop-a-dile, Two Tags Die, 1-1/4 Circle Punch, 1-3/8 Circle Punch, Circle Scallop Punch, 1/4 Real Red Grograin Ribbon, Glue Dots

Thanks for looking!

Happy Stampin and Scrappin,
Linda


Sunday, December 5, 2010

October Play Day Projects!

OK, so it is December, and I am behind!  Here are a couple of our October Play Day Projects:

PROJECT ONE:


I kept looking at the card in the Big Stampin Up catalog illustrating the Bright Blessings wheel, and used that as my inspiration for this card.  Sometimes cards kind of take on a life of their own, which is how I feel this card came about.  I really liked the way the Old Olive rickrack trim (from the Big Shot Tasteful Trim die) made this card "pop"!

Here is my recipe for this card:

STAMPS:  Bright Blessings Jumbo Wheel, Teeny Tiny Wishes, Falling Leaves (inside sentiment)
CARDSTOCK:  Cajun Craze 5-1/2 x 8-1/2 (score at 4-1/4), Very Vanilla 2 x 5-1/4, Soft Suede 2-1/8 x 5-3/8, So Saffron 2-1/4 x 5-7/16; Scraps of Very Vanilla, Soft Suede, Old Olive; Inside:  So Saffron 3-3/4 x 5, Very Vanilla 3-5/8 x 4-7/8
INK:  Crumb Cake, Cajun Craze
ACCESSORIES:  Jumbo Wheel Handle, Word Window Punch, Modern Label Punch, Color Spritzer Tool, Crumb Cake marker, Linen Thread, So Saffron Brads, Paper Piercer, Mat Pack, Dimensionals, Tasteful Trim Die, Big Shot

PROJECT TWO:


This card was inspired by one made by Ilina Crouse on Stampin Connection (Stampin Up demo website), and I used a windowpane technique I found on Mary Brown's (stampercamper) website.  I modified the windowpane technique slightly, and used a post-it note instead of scrap paper.  I used by square punch to punch the post-it note, making sure part of the sticky side was punched out.  Then I put the punched post-it notes where I wanted the windows to be, as you can see in the photo below:


I used a ruler to help make sure my windows were level, and to help with placement. 


After I have my post-it notes in place, I lined up my punch with the post-it notes, punched out my windows, and was ready to make the rest of my card!

Here is my recipe for this card:

STAMPS:  Jolly Bingo Bits, Teeny Tiny Wishes
CARDSTOCK:  Whisper White:  5-1/2 x 8-1/2, scored at 4-1/4; Real Red 3-3/4 x 5, Whisper White 3-5/8 x 4-7/8 and 3-1/2 x 4-3/4
INK:  Basic Black
MARKERS:  Basic Black, Pumpkin Pie
ACCESSORIES:  1-1/4 Square Punch, Dimensionals

Thanks for looking!
Happy stampin and scrappin!
Linda

Friday, November 5, 2010

Birthday Card and A September Play Day Project, Continued . . .

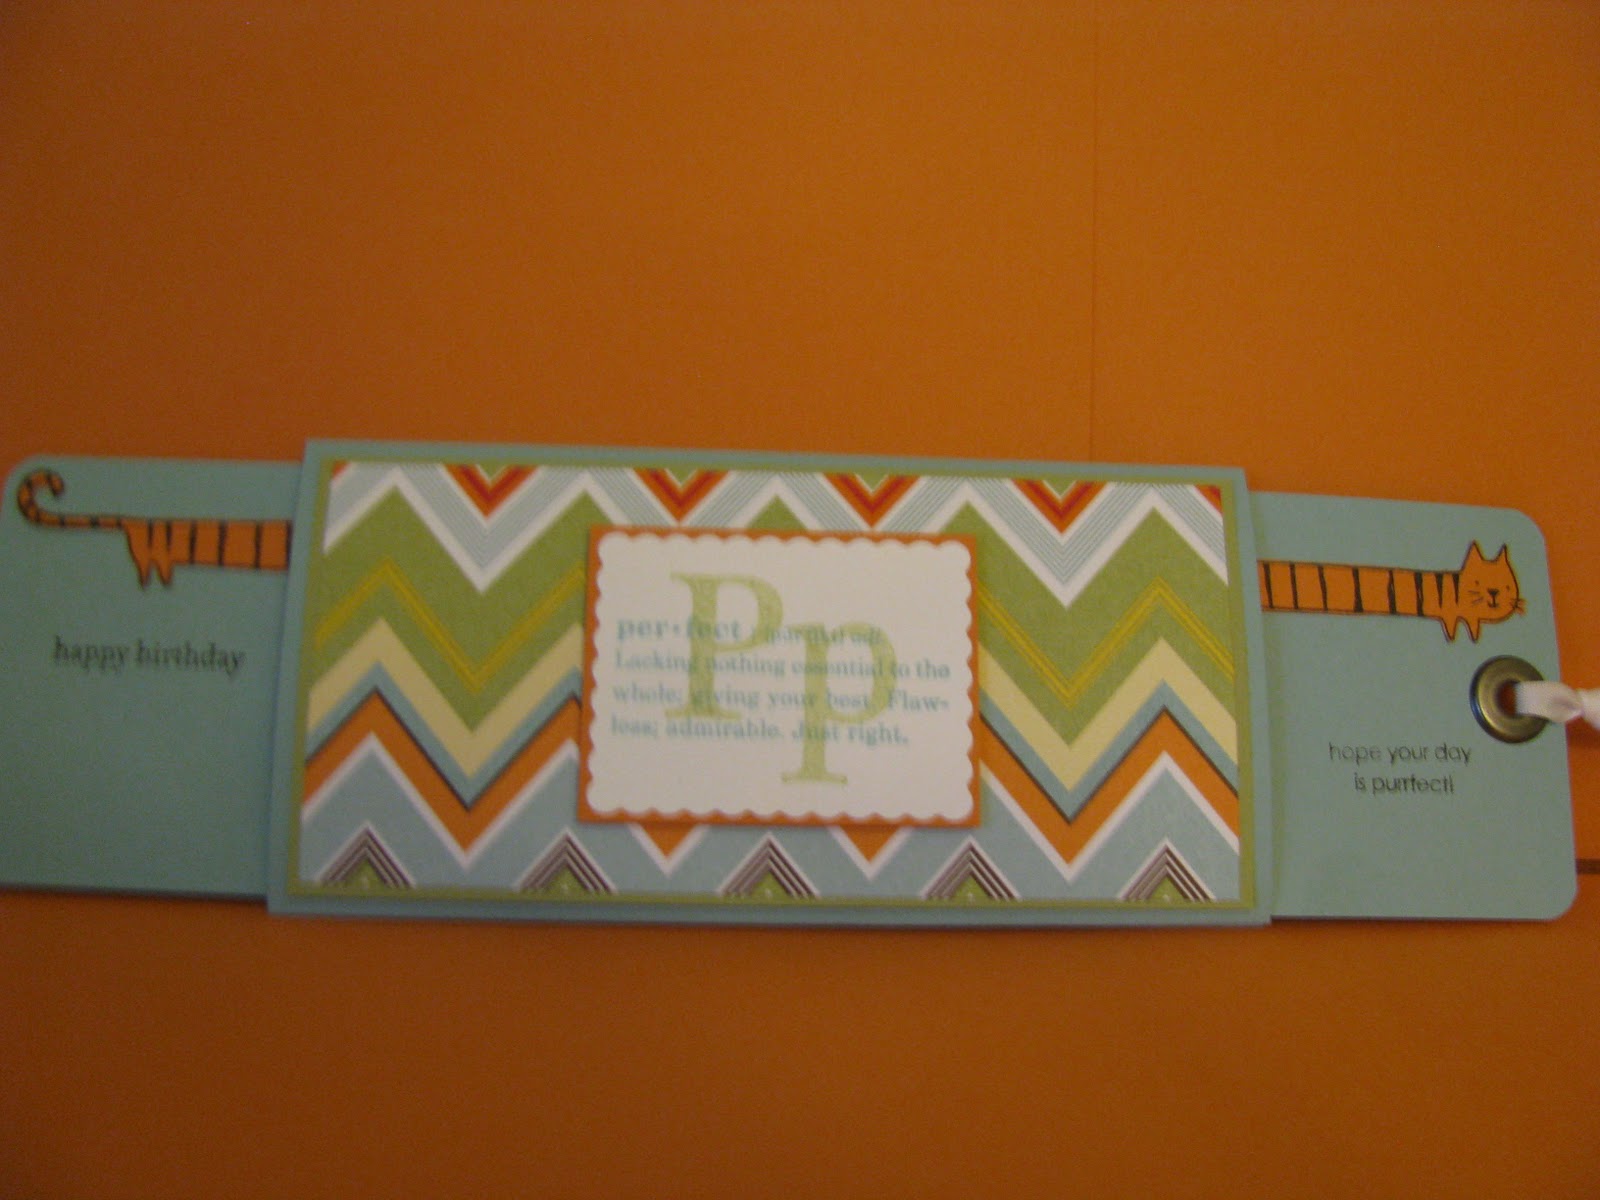
OK, I pressed the wrong button and got the first part of this post published.  I can't seem to get back to it to add to it, so I will just post a second part!!!  Here is the picture of the double slider birthday card open:


My recipe for the Double Slider Birthday Card is:

STAMPS:  Long Fellows, Teeny Tiny Wishes, Define Your Life, Defining Alphabet

CARDSTOCK:  Baja Breeze 5-1/2 x 8-1/2, score at 1/2, 3-1/4 and 6, Pear Pizzazz 2-1/2 x 5-1/4, Greenhouse Gala DS Paper, 2-3/8 x 5-1/8, Whisper White 2-1/2 x 3, Peach Parfait, 1-5/8 x 2-1/8, Baja Breeze 2-1/2 x 4 (2 pieces), Plastic Bag strip 1 x 11, Scrap:  Peach Parfait

INK:  Baja Breeze, Pear Pizzazz, Basic Black

ACCESSORIES:  Corner Rounder Punch, Crop-a-dile, Jumbo Eyelets, 3/8 Whisper White Taffeta Ribbon, SAMJ, Scallop Rectangle Clearlit, Big Shot, Dimensionals

I thought that the Long Fellows animals were perfect for this card (or "purrfect" as the case may be)!  See my previous post from today for the link to the tutorial for LeeAnn Greff's Double Slider card.

SEPTEMBER PLAY DAY PROJECT:

The last project we made at September Play Day is a card made with LOVELY AS A TREE stamp set:


My recipe:

STAMPS:  Lovely As A Tree, Hugs and Wishes

CARDSTOCK:  Old Olive 5-1/2 x 8-1/2, score at 4-1/4, Chocolate Chip 3-7/8 x 5-1/8, Very Vanilla 3-3/4 x 5

INK:  Old Olive, Chocolate Chip (also Old Olive and Chocolate Chip markers)

ACCESSORIES:  Scallop Frame Oval Die, Big Shot, Sponge

This is a nice flat card that will mail easily!

Thanks for looking!

Happy stampin and scrappin,
Linda
Friday, July 23, 2010

June Play Day Projects

OK, so I'm trying to get caught up!  This is my third post in two days, so I guess I'm on my way!  We made the Two Tag Die Box (posted previously) at our June Play Day, but here are the remaining three projects:

PROJECT ONE:


The recipe for this card:

STAMP SETS:
     Elements of Style
     Oval All
CARDSTOCK: 
     Real Red 4-1/4 x 11 (score at 5-1/2)
     Basic Black 4 x 4
     Whisper White  3-7/8 x 3-7/8
     Scrap Basic Black and Whisper White
INK:
     Basic Black Classic Ink Pad
     Real Red Classic Ink Pad
     Real Red and Summer Sun Markers
ACCESSORIES: 
     Square Lattice Embossing Folder
     Big Shot
     Paper Piercer and Mat Pack
     Vintage Brads (Black)
     Scallop Oval Punch
     Large Oval Punch
     Dimensionals

PROJECT TWO:


STAMPS:
     Watercolor Trio
CARDSTOCK: 
     Brocade Blue 4-1/4 x 11, score at 5-1/2
     Old Olive 3-7/8 x 4-1/2
     Whisper White 3-3/4 x 3-3/4
     Scrap Whisper White
INK: 
     Old Olive Classic Ink Pad
     Brocade Blue Classic Ink Pad
     Old Olive, Cameo Coral and Ruby Red Markers
ACCESSORIES:
     Scallop Edge Punch
     1-3/4 Circle Punch
     Dimensionals
     Sponge

PROJECT THREE:


My recipe for this card:

STAMPS:
     Sweet Scoops
     Teeny Tiny Wishes
CARDSTOCK:
     Melon Mambo 4-1/4 x 11, score at 5-1/2
     Pumpkin Pie 3-3/4 x 5
     Whisper White 3-5/8 x 4-7/8
     Pumpkin Pie 2-1/4 x 3
     Melon Mambo 2-1/8 x 2-7/8
     Whisper White 2 x 2-3/4
     Scrap Whisper White
INK:
     More Mustard Classic Ink Pad
     Melon Mambo Classic Ink Pad
     Pumpkin Pie Classic Ink Pad
     Real Red and Old Olive Markers
ACCESSORIES:
     Crystal Effects
     Perfect Polka Dots Embossing Folder
     Big Shot
     Sponge
     1/2" Striped Pumpkin Pie Ribbon
     Linen Thread
     Dimensionals
     Scallop Edge Punch
     Medium Jewelry Punch
     Paper Piercer and Mat Pack

After we made our card, we cut the flap off the end of a clear envelope, and attached it to a white gift bag, like this:


We used sticky tape, so that it would be good and strong.  We taped it on all four sides to attach it.  Then we slipped our birthday card into the clear envelope and have both a decorated gift bag and a handmade card!  (I saw this done at the Milwaukee Regionals.)  Here is a picture of how our finished bag looks:


Thanks for looking!

Happy stampin and scrappin!
Linda

Saturday, May 15, 2010

April Play Day Cards

For our April Play Day, we made cards for the ladies in our lives, Mothers, Sisters, and Friends!  Here are our projects:

PROJECT ONE:


This card was greatly inspired by a beautiful card by abstampin on Splitcoast Stampers.  My recipe is:

STAMPS:  Heard from the Heart, On Your Birthday
PAPER:  So Saffron, Melon Mambo, Very Vanilla, Razzleberry Lemonade DS Paper
INK:  Melon Mambo
ACCESSORIES:  Build-a-Brad, Scallop Edge Punch, Sticky Strip, Perfect Polka Dot Embossing Folder, Big Shot, 1/2" and 1-1/4" Circle Punches

PROJECT TWO:

This Post-it-Note Holder is a perfect little gift for that special friend, Mother or Sister!


STAMPS:  Tiny Tags
PAPER:  Tea Party DS Paper, Whisper White Cardstock
INK:  Pretty in Pink
ACCESSORIES:  Coaster, Post-it Note Pad, Binder Clip, Corner Rounder Punch, Tombo Mono Multi Liquid Glue, Medium Jewelry Tag Punch, 1/16" Circle Punch, Linen Thread, Very Vanilla 1/4" Grograin Ribbon

PROJECT THREE:


Project Three was a Swing or Flip Flop Card, which we made as a Mother's Day Card.  I really liked the way that this project turned out!  The flowers were stamped twice, watercolored, cut out, and popped up with dimensionals.  Here is the other side of it:


I think the double sided card is extra neat, and I love the way that it stands up!  I followed the excellent tutorial on Splitcoast Stampers to make this card.  My recipe for this card is:

STAMPS:  Blooming Beautiful, Teeny Tiny Wishes
PAPER:  Bashful Blue, Kraft, Watercolor, Bashful Blue DS Paper
INK:  Black Stazon, Watercolor Crayons
ACCESSORIES:  Aqua Painter, 1/4 inch Bashful Blue Grograin Ribbon, Dimensionals
SIZES OF PAPER:  Bashful Blue 5-1/2 x 6-3/4, Kraft 2-7/8 x 3-7/8 (2 pieces), Watercolor 2-3/4 x 3-3/4 (2 pieces), scrap Watercolor, Bashful Blue DS Paper (4 each of each size) 1-1/16 x 1-1/4, 1-1/16 x 2-9/16, 1-1/8 x 4-1/8

PROJECT FOUR:

We also made the Awash with Flowers card shown in my Milwaukee Swap card post.  It is the one with the scallop circle on the front!

This was a fun month, and I really liked the projects!

Thanks for looking!
Linda